Showing posts with label German. Show all posts

1 October 2014

Operation Market Garden (Part 2)

Operation Market Garden (Part 2)

Field Marshal Montgomery's goal was to force an entry into Germany over the Lower Rhine. He wanted to circumvent the northern end of the Siegfried Line and this required the operation to seize the bridges across the Maas (Meuse) River and two arms of the Rhine (the Waal and the Lower Rhine) as well as several smaller canals and tributaries. Crossing the Lower Rhine would allow the Allies to encircle Germany's industrial heartland in the Ruhr from the north. It made large-scale use of airborne forces, whose tactical objectives were to secure the bridges and allow a rapid advance by armored units into Northern Germany.


Several bridges between Eindhoven and Nijmegen were captured at the beginning of the operation but Gen. Horrocks' XXX Corps ground force advance was delayed by the demolition of a bridge over the Wilhelmina Canal. This caused an extremely overstretched supply line, and failing to capture the main road bridge over the river Waal before 20 September.

The Allied Airborne Army comprised of four divisions; two British and two American. Linked to it was the Polish Independent Parachute Brigade lead by Major-General Sosabowski.

The two most senior American commanders were Major-General Gavin of the 101st Division and Major-General Maxwell Taylor of the 82nd Division. Both men were knowledgeable in airborne warfare. The British First Airborne Division was lead by Major-General Urquhart. He was an unusual choice to lead the Airborne Division as he had never parachuted before, never participated in a glider landing and got air sick. He, himself, expressed his surprise when he was appointed commander of the division.

Robert Urquhart

The First Airborne Division had not taken part in D-Day. It had been kept in reserve and had remained inactive after June 1944. A number of planned operations had been cancelled at the last minute because they were not needed due to the success of the British armoured columns on the ground. By September 1944, the First Division was "restless, frustrated and ready for anything". Urquhart said that it was:"Battle-hungry to a degree which only those who have commanded large forces of trained soldiers can fully comprehend."

The First Division was given the task of capturing the bridge at Arnhem and holding it. The 101st Division was to capture the Zuid Willems Vaart  Canal at Veghel and the Wilhelmina Canal at Son. The 82nd Division was to capture the bridges at Grave and at Nijmegen.

The attack had to be planned in just six days. Urquhart's First Division faced two major problems; the shortage of aircraft and the belief that the bridge at Arnhem was surrounded by anti-aircraft guns that would make a landing by the bridge itself too difficult.

The Americans were given the priority with regards to aircraft. The capture of the bridge at Arnhem would be pointless if the Americans failed to captured their targets. Therefore, the Americans would be carried to their targets in one lift whereas the attack on Arnhem would be done in three separate lifts during the day. Any night time landings were considered too dangerous.

This posed a major problem for Urquhart. His first force would have the element of surprise and, if the German resistance was minimal, would hold the bridge and secure any landing zones for the gliders. However, any subsequent landings would be after the Germans would have had the time to get themselves organised.

Intelligence reports also showed that the flak around the bridge itself was heavy. This was confirmed by RAF bomber crews who encountered the flak on their regular flights into Germany. Urquhart decided to make his landings to the west away from the bridge even though he knew that this was a risk. If the German resistance was stronger than anticipated, there was the chance of the first landing not even getting to Arnhem Bridge and taking out the flak.

British Intelligence reports indicated that the German presence in Arnhem was minimal. It was believed that the Germans only had six infantry divisions in the area with 25 artillery guns and only 20 tanks. German troops, in an Intelligence report of September 11th, were said to be "disorderly and dispirited". A similar report was made on September 17th.


Arnhem, the Bridge too Far:
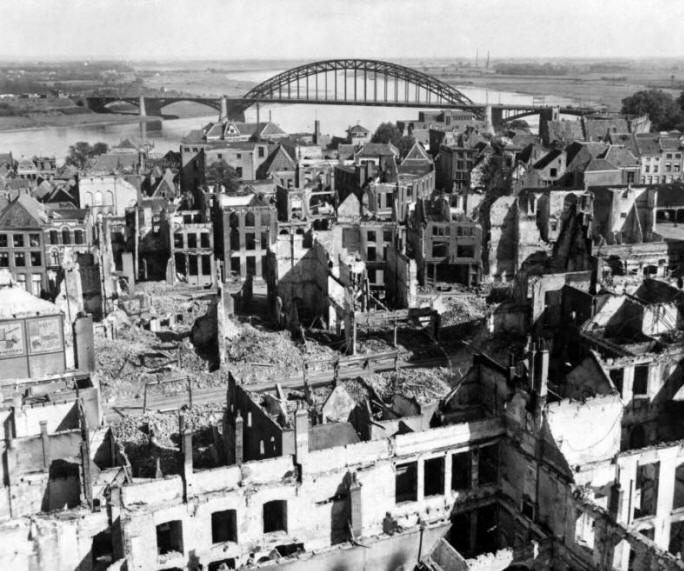


At Arnhem, the British 1st Airborne Division encountered far stronger resistance than anticipated. In the ensuing battle, only a small force managed to hold one end of the Arnhem road bridge and after the ground forces failed to relieve them, they were overrun on 21 September.

The rest of the division, trapped in a small pocket west of the bridge, had to be evacuated on 25 September. The Allies failed to cross the Rhine in sufficient force and the river remained a barrier to their advance until offensives at Remagen, Oppenheim, Rees and Wesel in March 1945. The failure of Market Garden ended Allied expectations of finishing the war by Christmas 1944.

Arnhem Timeline


September 17th 1944Operation Market Garden began. The British landing near Arnhem is met by heavy German resistance. The American 82nd Division captured its targets at Waals but met heavy resistance at Nijmegen.
September 18th 1944A German counterattack stopped the Americans entering Nijmegen. The British landing zone near Arnhem was heavily attacked by Bittich's SS in an effort to stop further British landings.
September 19th 1944The leading elements of the British 30th Corps reached the Americans at Nijmegen but all efforts to break through to the British at Arnhem fail.
September 20th 1944The bridge at Nijmegen was captured by a combined US/UK assault.
September 21st 1944The British paratroopers defending the northern end of the bridge at Arnhem were heavily attacked. Those British troops who did not get through to Arnhem formed a defensive barrier west of Oosterbeek.
September 22nd 1944The advance of British tanks to relieve Arnhem was delayed  as a result of German attacks.
September 23rd 1944Attempts by the Poles and troops of 30th Corps to cross the river at Arnhem failed.
September 25th 1944The surviving British troops were evacuated but nearly 3000 were captured. Over 1,200 British troops were killed in a plan that went a 'bridge too far.'

Reports from the Dutch Resistance indicated beforehand that SS units had been seen in the Arnhem area. The First Airborne Division was only given this information on September 20th - three days after the attack on the bridge at Arnhem had begun.

Operation Market Garden began on Sunday morning, September 17th, 1944. Luftwaffe fighters bases had been attacked as had German barracks based near the drop zones. 1,000 American and British fighter planes gave cover as the gliders and their 'tugs' crossed the North Sea and headed over mainland Europe. The greatest fear was from flak and Intelligence estimated that the loss of gliders and transport craft could be up to 40%. As it was, very few of the 1,545 aircraft and 478 gliders were lost.

The 82nd Division landed without major problems around Grave and Nijmegen. The 101st Division was equally successful and by nightfall, the Americans and British armoured corps had met up in Eindhoven.


However, by the 18th September, fog had played its part. The glider and tug flights that were due to cross on the second day could not do so. This affected the 82nd Division in that Gavin had fewer men to attack the bridges at Waal, especially the road bridge that had held out for three days during the German attack on Holland in 1940. This bridge only fell in the evening of Wednesday 20th after a combined American/British attack. With this bridge captured, the 30th Corps armour could race towards Arnhem to relieve Urquhart's First Airborne Division there.

At Arnhem, the British met much stiffer opposition than they had been lead to believe. The IX th and X th SS Panzer Divisions had re-grouped at Arnhem - as Dutch resistance had warned. Both groups comprised of 8,500 men lead by General Willi Bittrich.

These were not the poorly equipped German garrison troops,  low in morale, that British Intelligence had claimed were stationed at Arnhem. Bittrich - a highly regarded general in the Waffen SS - sent in the IX SS Division to the British landing zones immediately. The X Division was ordered to Nijmegen to stop the 2nd Army group advancing on Arnhem. Bittrich was confident of success:

"We shall soon be able to discount the threat of the British north of the Neder Rijn. We must remember that British soldiers do not act on their own initiative when they are fighting in a town and when it consequently becomes difficult for officers to exercise control. They are amazing in defense, but we need not be afraid of their capabilities in attack." - Bittrich.

The men from the IX th Division quickly created a formidable defensive line to stop the British advancing to Arnhem. The British faced a number of serious problems in the landing zone. Nearly all the vehicles used by the Airborne Reconnaissance Squadron were lost when the gliders carrying them failed to land. Therefore the advance into Arnhem itself was delayed but also had to be done almost entirely on foot. The job of the Reconnaissance Squadron was to move off in jeeps etc. in advance and secure bridges and roads. This they could not do after the loss of their vehicles. The maps issued to officers also proved to be less than accurate.

The British paratroopers quickly came under German fire. Only the 2nd Battalion lead by Lt. Col. Frost moved forward with relative ease but even they were occasionally halted by German fire. Frost's men were the most southerly of the British units and the Germans had covered their route to Arnhem less well than the other routes the British were to use.

When Frost got to the bridge at Arnhem, he only had about 500 men. He secured the northern end of the bridge and the buildings around it but he remained heavily exposed to a German attack across the bridge as the British had failed to secure the southern end of the bridge. Around Arnhem, British troops, engaged in combat with the SS, took heavy casualties. By now, the Germans were being reinforced with SS crewed Panzer VI Tiger tanks.

Despite being short of ammunition and with no food or water, Frost's men continued fighting.

A German who fought in the final battle for the bridge wrote:

"(The fighting was) an indescribable fanaticism...and the fight raged through ceilings and staircases. hand grenades flew in every direction. Each house had to be taken this way. Some of the British offered resistance to their last breath."

The 2nd Army failed to reach Arnhem. In the final drive - just 10 miles - from where the 2nd Army was to Arnhem, the SS fought with great skill seriously delaying the forward momentum that the 2nd Army had previously developed. Those British troops who remained in the Arnhem area were caught in land that the SS called 'The Cauldron'. A decision was made to withdraw. Those soldiers that could be evacuated were but many wounded were left behind.


In all, over 1,200 British soldiers had been killed and nearly 3,000 had been taken prisoner. 3,400 German troops had been killed or wounded in the battle.

Why did the plan fail?

  • The speed with which Bittrich organised his men and his tactical awareness were major reasons for the German victory. British Intelligence had ignored Dutch Resistance reports that SS units were in the region. This was a fatal mistake.
  • When the paratroops landed they found that their maps were inaccurate regarding the layout of the roads in the Arnhem area. 
  • Another major problem was that the radio sets issued to the men only had a range of 3 miles and thus proved to be useless when the various segments of the British army in the area were spread over 8 miles. Lack of communication proved a major handicap for commanders on the ground who rarely knew what other commanders were doing or planning. 
  • Landing was also planned to be spread over three days, The 1st Airborne Division was never up to full strength, and the element of surprise was lost

24 June 2014

Operation Bagration: The first shots fall

First Shots of Operation Bagration

Thursday night, games night. Happens to almost co-incide with the actual 70th anniversary of Operation Bagration.

Flames of War in 20 mm. Second or third FoW game for Laurie, ably assisted by David, and visitor (and  potential new member) Tielman, ex Frankfurt am Main in Germany (Impartial observer, but obviously an experienced gamer)

Operation Bagration 22 June - 26 June

22 June 1944: A German Panzer Comapny meets up with a Russian Tankovy suppported by a small Motostrelkovy.

2 pre-prepared 1000 points lists:
I roll to get the Germans, Laurie to command the Soviets.

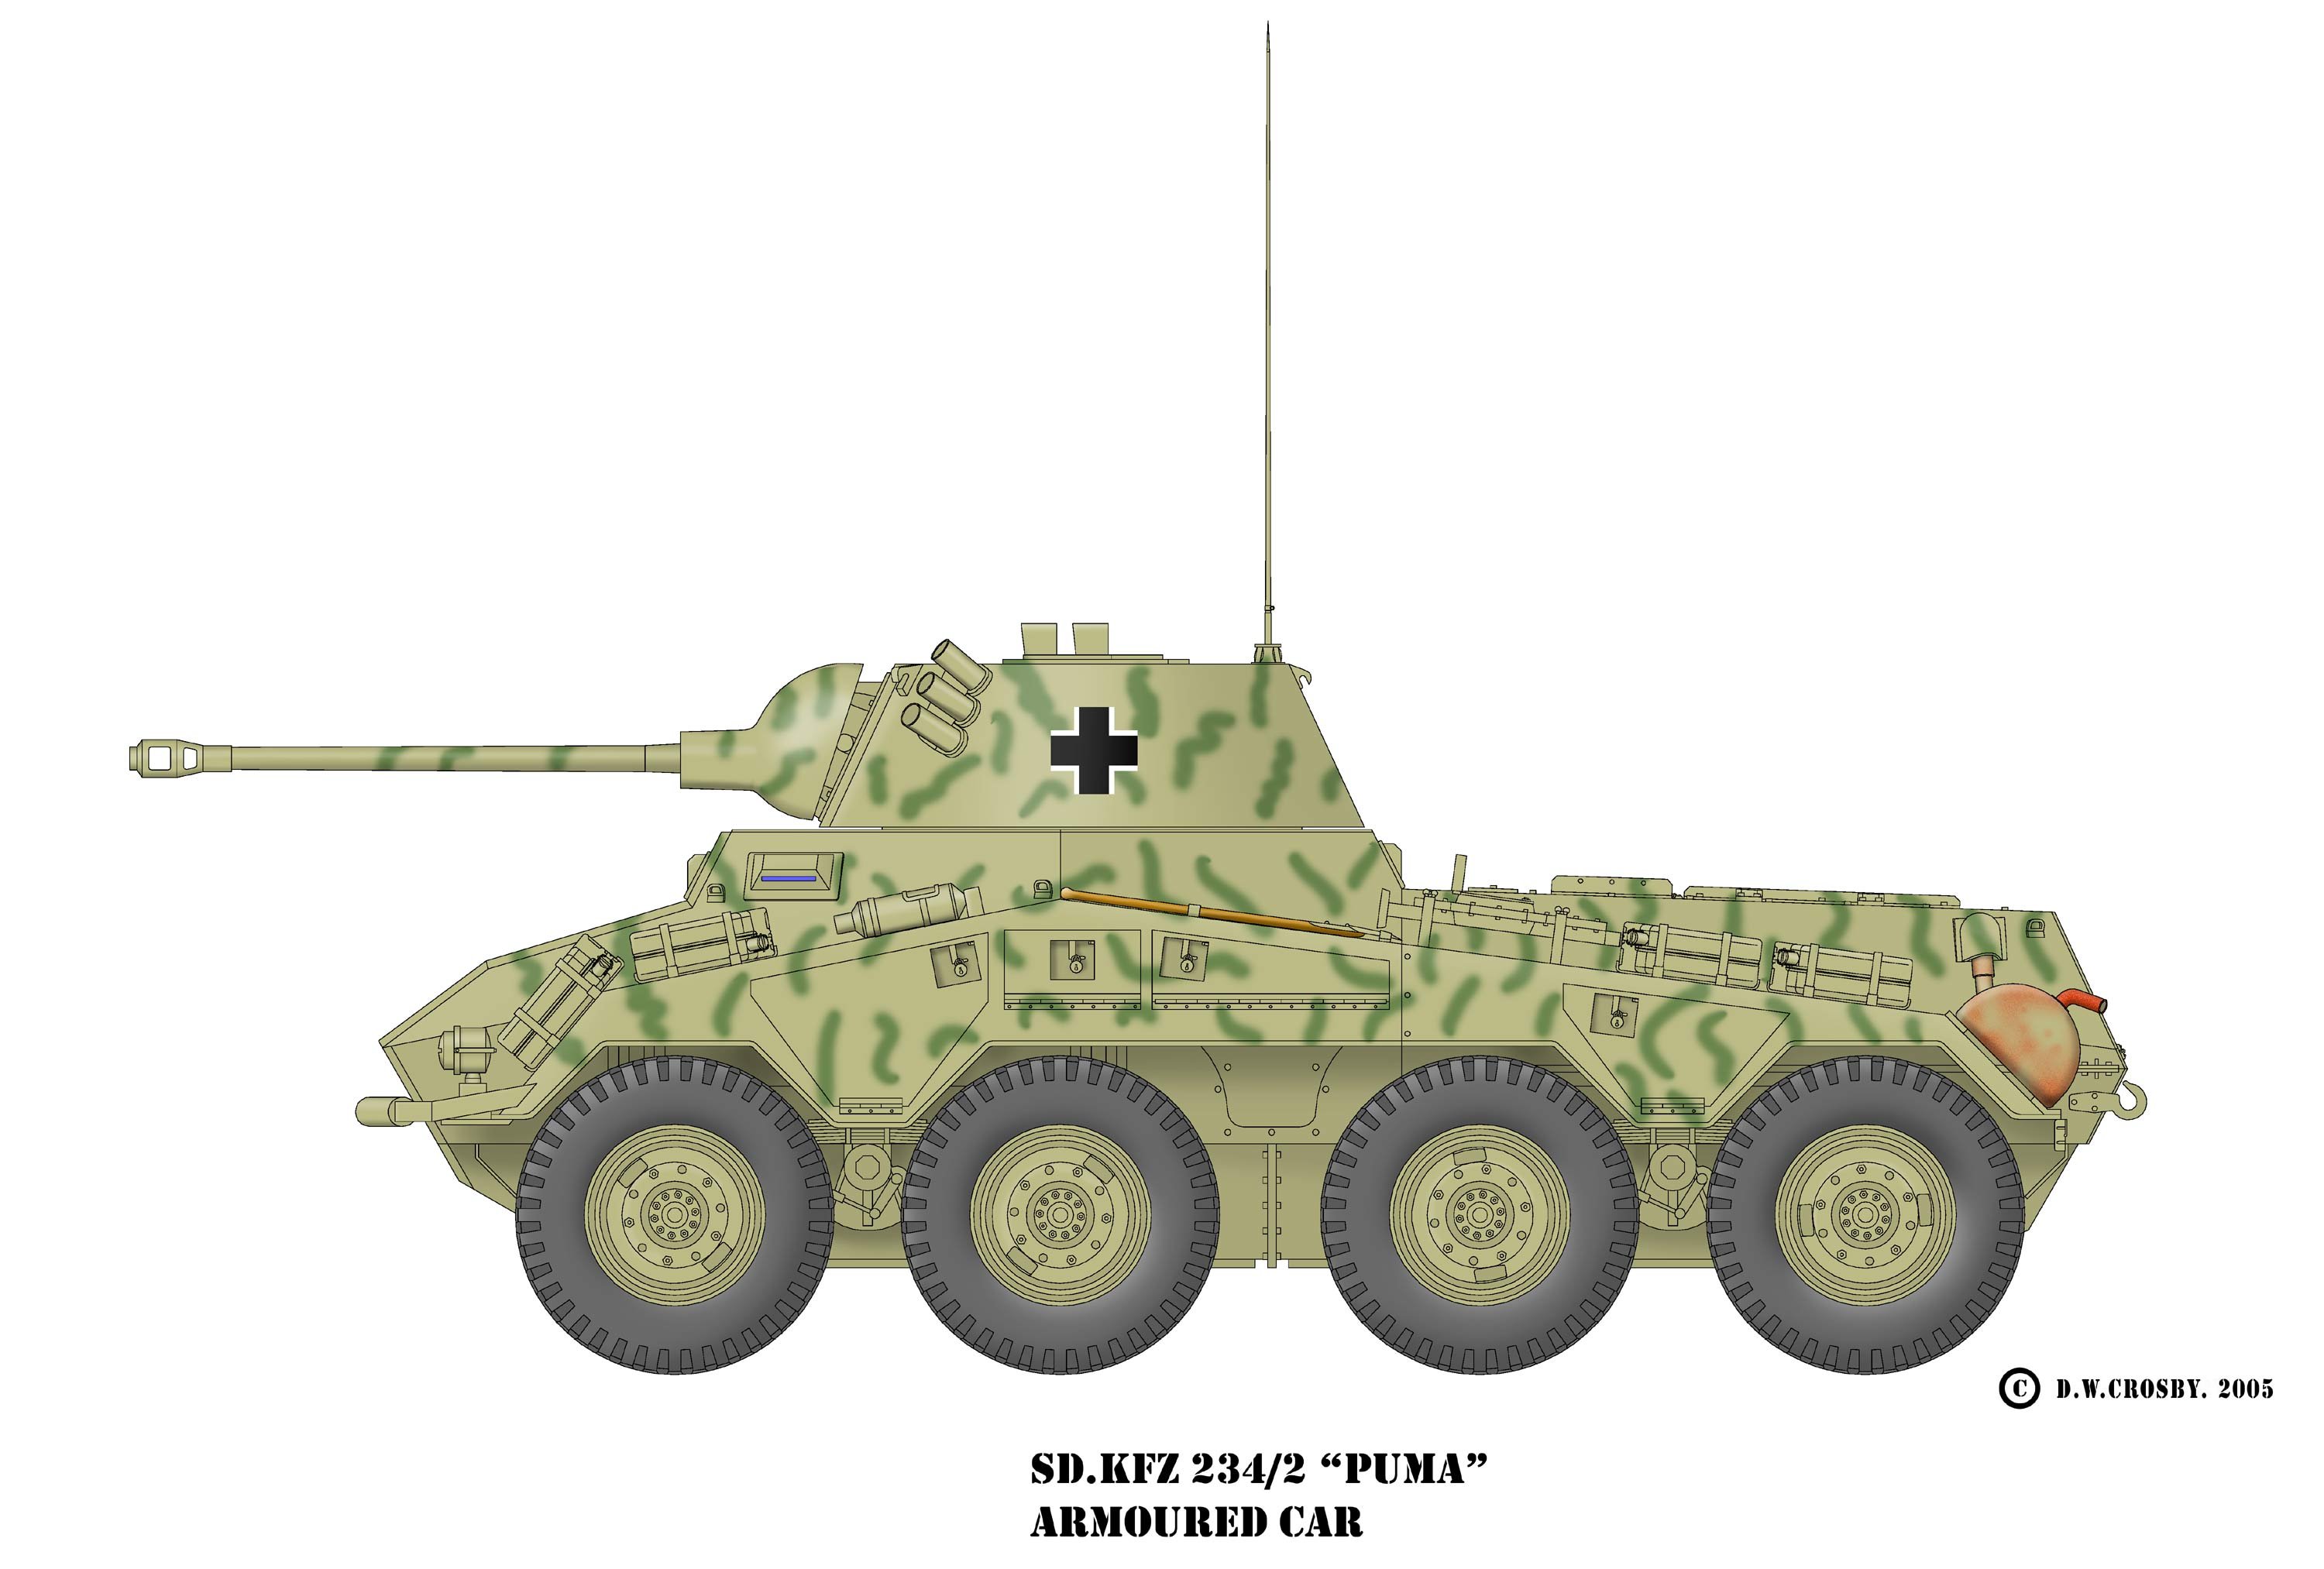
Germans field a Panzer IV unit, 4 Panzer IV Gs and a command section with the Major and the 2 IC in similar tanks and a recovery SdKfz 11;  KWK 75mm long guns, 2 Reconaissance  Armoured cars: 2 Pumas with 50 mm KWKs, 3 Stug Gs, one with saukopf mantlet (Thanks Scott, nice and easy way to distinguish troop commander) and 2 with square mantlet. 2 x Pak 40s. No more points left after that :( 
Germans are confident veterans of the Ostfront.

Russkis have Command and 2-IC in T-34 Obr 1942's, another troop of 5 x T-34s, and a separate troop of 6 Sherman lend-lease tanks. Mortar section with 4 x 120 mm heavy mortars; and the Motostrelkovy with 2 Maxim HMGs. Kommissar to invigorate the somewhat reluctant infantry. Russians are confident trained

Laurie rolls, and elects that I deploy first.

Terrain
We have an open rolling pastoral landscape, some where east of the Dnieper river. (So 9th German Army and 9th Russian Tank Corps elements coming head to head, leading up to the large clash at Bobruisk. (!st Byelorussian Front) Pripyat (Pripet) Marshes do not feature (yet):

A single farm-house with two small wheat fields at the centre of the table, a small copse of fir trees to the north and south, and a low hill to the west. A chance engagement, with both forces vying for the farmhouse, with an unsubstantiated  rumour that went round that an attractive farm-girl who brews her own Vodka resided there...


The Panzerspaeh unit deployed first, off to the southern edge of the table. Knee-jerk response from Generalski Laurie saw the 6 Shermans deployed to cover the flank. The Germans then deployed 3 stugs threatening their flank in return.
Russians deployed their T34s on the Northern flank. Germans set 2 x Pak 40s in the centre of their lines, with direct lines of sight to T34 unit.

Displaying photo.JPG

Let's take out the soft armoured cars first! Then we take the woods.

The soviet mortars took position on the far left corner, with observers in the woods. German command tanks parked behind the Pak 40s, able to strike left or right, depending where the threat came from. 

Russian commander sought to bolster the numbers of his T-34 force, and followed in the furrows ploughed by the lead tanks. Russian Motostrelkovy deployed amongst the Sherman tanks, set to take the objective in the forest between them and the Pumas. Last to deploy were 4 Zis-3 AT guns, straddling the centre of the board on the Russian side. The bulk of the farm house interfering with line of sight to the Pak 40s (phew!)

Genl. Lauriski goes first: Shermans roll forward, and take a bead on the Pumas. Being recce vehicles they decide that discretion is the better part of valour. Or so they thought: Out of the frying pan and into the fire. Well, sort of. One vehicle was able to scoot behind the low hill and out of sight, but the lead armoured car went too far, and exposed himself to the line of fire of the rear-most Sherman. Fatal mistake.

Mortars range in on the Pak40s, succeed in dropping their 120 mm ordnance, but failing to do any damage.
Not so the T-34s. The two PzKfw IVs go up in flames. The Russians artillery fails to do any damage, and their unit commander radios for the Kommissar to come over.


The Germans are infuriated by the loss of their beloved PzKfw IVs, the troop commander fires off two rounds, two hits, and two T34s go up in smoke. "See Ivan, this is what Krupp Steel does !"

The Pak 40s follow suit, and soon 4 T-34s in total are blazing hulks. The hot-headed junior officer in the Puma is encouraged by the success of the artillery, and charges into the flank of the Sherman unit, quite foolishly. He pumps two shots into the nearest Sherman's flank, destroying it. In his urge to avenge his colleagues he ends his game turn hopelessly exposed. 

The grizzled veteran Heer stug commander shrugs. "Must have a throat ache !" (Wehrmach slang for a desire to obtain the knight's cross, worn at the throat) A volley of 6 armour piercing 75mm shots from the StugGs, and several Tommy Cookers live up to their names, except in this case it is Ivan receiving the heat, not Tommy.

Turn 2 sees the Motostrelkovy take the objective in the woods on the back of the Sherman thrust; without firing a single shot, and the Shermans turn their attention to the isolated Puma and the Stugs, destroying the Puma outright. The Ritterkreuz was bestowed posthumously on Leutnant Brasch. The low profiles of the Stugs and having to shoot through the woods makes life difficult for the Russian gunners. Shots hit, but fail to do any damage. Another dismal performance from the artillery. 

Mortars again make up for the lack of efficacy from the Zis 3s, and destroy the observation team for the 75mm guns.Glancing shots hit the Command Unit's tanks, they bale out, but remount in their turn.The remaining panzer fails its morale test, and flees off the table to warn the OKW about what is happening.

Germans counter-attack, with the Stugs wiping out the Shermans, and the Pak 40s sowing sorrow among the T-34s, destroying them to the man, commander included. The Soviets will have to start taking company morale tests!

Soviets pass their first company morale check, and turn to their artillery to finish the job. It appears the artillery have finally found their mark! Maybe the threat of the Kommissar increased their zeal, or was it the sight of 2 PzIVs barrelling down on them ? Blam goes the SdKfz 11  recovery vehicle of the command platton

Displaying photo.JPG

Two stugs go up in flames, a Pak 40 is lost, and the gunnery command team too. The Strelkovy prefer sit on their objective in the woods, smoking those black Russian cigarettes with the acrid smoke...

The German turn sees their command unit making a bee-line for the farm-house, trying to shelter from the Zis 3 guns. The stug makes double time to get to the second objective. By hook or by crook...


A war of attrition ensues. Ivan hits and bails both the command panzers. The Pak 40 survives, but the Stug is also bailed. Looking pretty grim for the Germans. "Ach Hans, I could see the Liebling with the Vodka!"

Displaying photo.JPG

The Stug crew successfully remounts, but both the PzIV remain bailed. Looks like the writing is on the wall...

Lauriski rolls his company morale test: a 1!
No! The Soviets crumble and run ! Apparently they had enough. I suspect some harsh words and actions will follow from Herr Kommissar, Ja?

An epic slog-fest, and a very enjoyable game.


11 June 2014

Let the Cannon Speak !

Artillery galore! Project "Let the Guns Speak"

(or Get your artillery finished! -  Written before my Bagration photos)

I built quite number of artillery pieces for the D Day landing scenario we played a few weeks ago. Did not have time to get everything based, so I have been beavering away at these. Also have quite a few that were un-built or part built from the Kursk battle last year. Artillery crew needing painting and basing too.

Bases built and some flocked, in my current habitual autumn colour scheme, and allowing some snow for the Russki's. I obtained a number of JB Post-war 105mm Howitzers at bargain basement price, so I decided to bend time a bit, and employ these as medium artillery during WW2. Would also be useful for post-war / Korea / Cold war scenarios. I had purchased a Korean war set off Trade Me some time ago, and have some Persing Tanks that would do just fine for a Korea Battle. All to often that is a forgotten war, overshadowed by WW 2 and Vietnam.

So on my workbench now we have:

Russians:
5x Zis 3 guns (Italeri); to make a total battery of 11 when added to the fully built ones. - done


Italeri's Zis Gun and Crew (Photo WW2 Plastic Soldiers)

The box always brings a smile to my face. The Crew are called "Servants" - good old google translate!


4x M 30 122mm Howitzers  (Zvezda) - done
2 x 37mm Antitank Guns (Zvezda); battery of 4 - done
2 x 37 mm AA Guns (Zvezda) - pending

Western Allies:
2 x 17 Pounder Antitank guns, another 2 on the way off TradeMe (NZ Ebay equivalent) (Matchbox, me thinks) - base-coated


This kit has become quite hard to come by. 


7 x 25 Pounder Guns (Airfix and Matchbox) - done
7 x 6 Pounder antitank guns (Airfix) - done
2 x Bofors AA Guns (Airfix) - 1 done, one built
Un-built: 3 more Bofors, - all built
5 x 5.5 inch Field guns w Matadors - guns built, base-coated, Matadors 2 halfway built, 3 base-coated; (Another 2 models are in the post as I write) Tractors for the Bofors guns halfway through building process: Still need loading trays and wheels

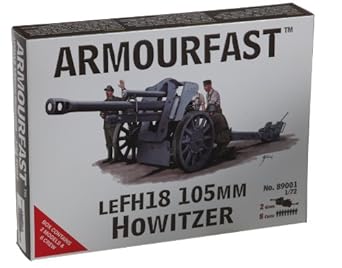
Germans: 2 x LeFH 18s (Armourfast) Only to be based, the portly crews to be based and painted


Portly Armourfast German Artillery officers. Obviously life was good for them in occupied Europe
They would have lost that tube around the middle quite rapidly in a Soviet PoW Work Camp
Photo Plastic Soldier review

2 x Nebelwerfer (Hasegawa) 1x Pak 40 (Matchbox)

Quite handy: Many of the artillery pieces come with tractors and limbers, all of which have many other uses

As usual I have been side-tracked to research the history...

The Zis-3:


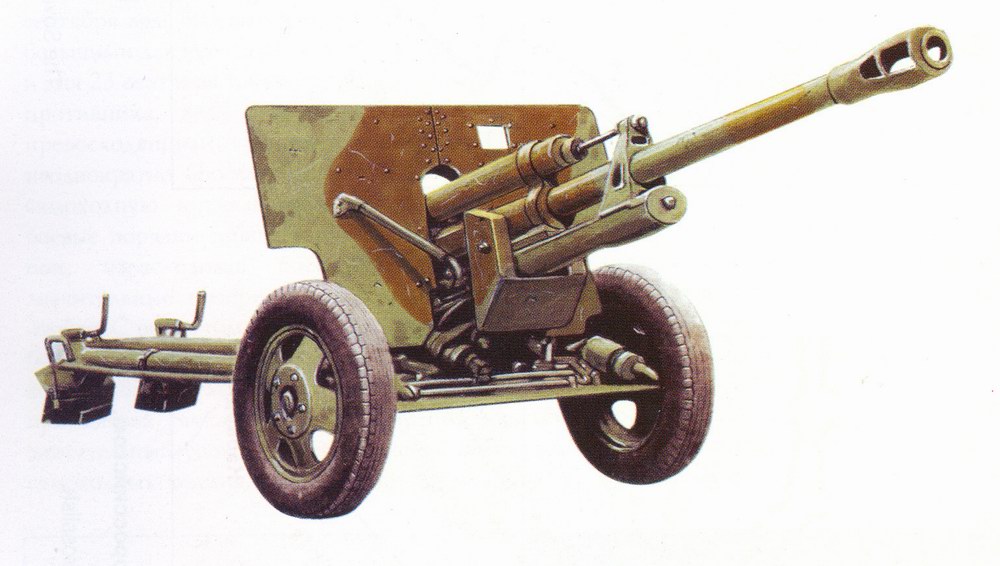
76 mm Divisional field gun model 1942 (Zis-3)

The design work on the ZiS-3 started in the end of 1940 at the  the Artillery Factory No. 92 under supervision of V. G. Grabin, the chief designer of medium caliber Soviet guns. There was no order for this work; moreover, at this time the attitude toward such development programs on the part of artillery commanders, such as Marshal Kulik, the head officer of Soviet artillery, was extremely negative. So the project was run purely on the initiative of Grabin, his design bureau and the Artillery Factory No. 92 head and his deputies. None of them informed state authorities (i.e. Marshal Kulik) about the ZiS-3 project.

It was a combination of the light carriage from the 57 mm ZiS-2 anti-tank gun and a powerful 76.2 mm barrel from the previous divisional field gun F-22 USV. In order to decrease the gun's recoil a muzzle brake was installed. This allowed the barrel to be mounted on a relatively light carriage without the risk of mechanical damage when firing. In comparison with the F-22USV gun, the ZiS-3 utilized better production technology. Many parts of the gun were cast, stamped or welded in order to reduce the amount of machining work. As a result, the amount of work required to construct a single ZiS-3 gun was three times less than that of the F-22 USV gun, and the cost only two thirds that of an F-22 USV.

The first ZiS-3 gun was hidden from the watchful eyes of state authorities, who continued to ignore the Red Army's need for light and medium field guns. The  main argument was that German heavy tanks carried exceptionally strong armour. Germany did not have such tanks in early 1941 and this misinformation was actually the result of successful Nazi propaganda. Kulik had believed the propaganda and stopped production of light 45 mm anti-tank guns and 76.2 mm divisional field guns.


The beginning of Operation Barbarossa showed that the early German tanks had weaker armour than anticipated. Some were even vulnerable to large caliber DShK machine guns. Pre-war models of 76 mm divisional guns penetrated German vehicles with ease, but almost all these guns were lost or destroyed.

Some were later used against Soviet forces as Panzerjäger self-propelled guns, built on captured or obsolete chassis.  Kulik ordered that mass production of 76.2 mm divisional field F-22 USV guns be relaunched. Grabin and the head staff of Artillery Factory No. 92 decided to organize the mass production of ZiS-3 guns instead of F-22 USVs. They succeeded, but ZiS-3 was not officially tested and adopted for Red Army service.

The Red Army was in urgent need of these guns, the guns themselves were fine and numerous due to improved production technology, but all of them were held  in stock at Artillery Factory No. 92, since the military representatives refused to receive non-official guns. After some internal struggle between Grabin's team and military representatives, ZiS-3 guns were finally transferred to the Red Army under personal responsibility of Grabin and Artillery Factory No. 92 head staff.


Combat experience showed the superiority of ZiS-3 over all other types of divisional level field guns. This allowed the ZiS-3 to be presented to a group of state authorities headed by Joseph Stalin and thus obtain all needed approval. After the demonstration was over Stalin said: "This gun is a masterpiece of artillery systems design." There was a five-day official state test run in February 1942. The result of this test was quite clear - ZiS-3 was adopted by the Red Army as Divisional field gun model 1942 .

Grabin and his team soon begun to improve on the technology used in the ZiS-3 mass production. Artillery Factory No. 92 was equipped by conveyor assembly lines, which allowed the factory to produce ZiS-3 in even greater numbers. The young men who worked on Artillery Factory No. 92 were exempt from conscription. By the end of World War II, ZiS-3 was the most numerous Soviet Army field gun. The total number of ZiS-3s produced exceeded 103,000 pieces. The Finns captured 12 units, and designated them 76 K 42.

After the war ZiS-3 mass production ceased. It was replaced by the next model of divisional field gun, D-44, which had a larger caliber (85 mm) and better anti-armour capabilities. But it weighed much more and its mobility was thus inferior to that of the ZiS-3.


Combat history
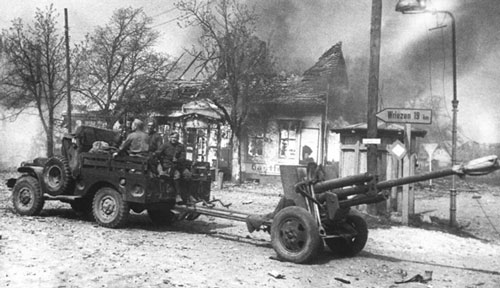
Soviet soldiers liked ZiS-3 guns for their extreme reliability, durability, and accuracy. It was easy to maintain these guns and train novice crews with them. Light carriage allowed the ZiS-3 to be towed by trucks and heavy jeeps (such as the American lend-leased Dodge 3/4) or even hauled by the crew.

ZiS-3 had good anti-armour capabilities, it could knock out any German light and medium tank with its armour-piercing round. The appearance of the Tiger I and later the Panther, however, made the lives of ZiS-3 crews much harder, for their frontal armour was immune except for some small ballistic windows.

A battery of ZiS-3 consisted of four guns, with three batteries combined into a division, or battalion. Independent anti-tank regiments consisted of six batteries with no divisions. In addition to the gun batteries there was a staff battery which included a fire control section.

The ZiS-3 saw combat service with North Korean forces during the Korean War (1950-1953).

During the Cold War many ZiS-3s were transferred to different Soviet allies, and often resold to Third World countries. Armies of several African and Asian countries still have ZiS-3s in active service today. Moreover, these guns are still used in combat during numerous local conflicts and border skirmishes.

All Soviet ZiS-3s were officially withdrawn from active service. Some of them were scrapped, some were transferred to holding facilities and others were converted to Great Patriotic War memorials. Such memorial cannons are quite common in modern Russia and Belarus. The Russian Army uses some ZiS-3s  as unit and barrack historical decoration in artillery units. Other surviving ZiS-3s are still operable. Sometimes ZiS-3s are used as salute guns or in re-enactment and military shows.

9 June 2014

Back to Bagration?

The Russian Offensive: Operation Bagration

Not really "Back to Bagration", but the alliteration could not be resisted ! Have not played this historical era before, but working on it ! Maybe the title of this post should read "Backed by Bagration" reflecting the triple whammy landed on Hitler's Third Reich:

In Italy the fall of Monte Cassino, then Rome; in Normandy the D-Day landings, followed by Bagration in the East 1944 would deliver a series of crippling blows from which Reich could not recover.

Working away at my Fall/Autumn Russian 1/72 army for a few weeks:

Have almost finished my Siberian ski troops, all based now, just needing one more coat of paint.
Multiple Zis 3 76 mm Guns and 4 x 122 mm Howitzers at the ready, PTRDs and Maxim guns by the handfuls. Darn fiddly those Esci/Matchbox Maxims!


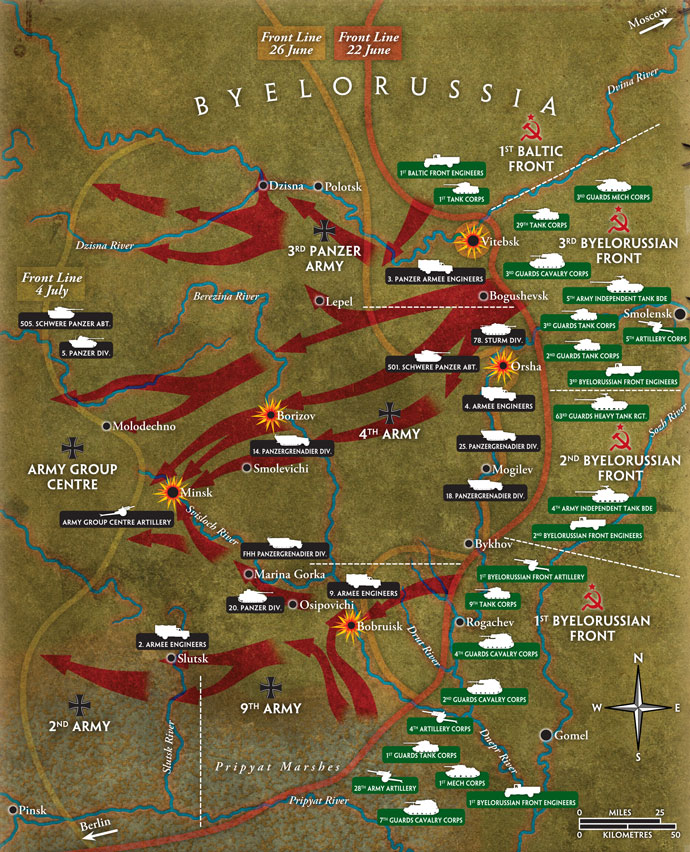
From Wiki: Operation Bagration (Russian: Oперация Багратион, Operatsiya Bagration) was the codename for the Soviet 1944 Belorussian Strategic Offensive Operation during World War II, which cleared German forces from the Belorussian SSR and eastern Poland between 22 June and 19 August 1944.

The operation was named after 18th–19th century Georgian Prince Pyotr Bagration, general of the Imperial Russian Army who received a mortal wound at the Battle of Borodino.


The operation resulted in the almost complete destruction of an entire German army group, with the loss of Army Group Centre's Fourth Army, Third Panzer Army and Ninth Army. It is considered the most calamitous defeat experienced by the German armed forces during the Second World War.

By the end of the operation most of the western Soviet Union had been liberated and the Red Army had achieved footholds in Romania and Poland. German losses eventually numbered well over half a million men killed or wounded, even higher than the toll at Verdun in 1916.

The Soviet armies directly involved in Operation Bagration were the 1st Baltic Front under Army General Ivan Bagramyan, the 1st Belorussian Front commanded by Army General Konstantin Rokossovsky, the 2nd Belorussian Front commanded by Colonel-General G. F. Zakharov, and the 3rd Belorussian Front commanded by Colonel-General Ivan Chernyakhovsky.


The objectives of the operation were complicated. The Red Army practiced the concept of Soviet deep battle and maskirovka. One American author suggests that these Soviet innovations were enabled, in part, by the provision of over 220,000 trucks by the United States to motorize the Soviet infantry. It has been suggested that  the primary target of the Soviet offensive was the bridgehead on the Vistula river in central Poland, and that Operation Bagration was to create a crisis in Belorussia to divert German mobile reserves to the central sectors as a part of maskirovka, removing them from the Lublin-Brest, Lvov–Sandomierz area where the Soviets intended to undertake the Lvov–Sandomierz Offensive and Lublin–Brest Offensive.

 This allowed the Red Army to reach the Vistula river and Warsaw, which in turn put Soviet forces within striking distance of Berlin, conforming to the concept of Soviet deep operations — striking deep into the German force's strategic depths.

Background
Army Group Centre had previously proved tough to counter as the Soviet defeat in Operation Mars had shown. But by June 1944, despite shortening its front line, it had been exposed following the withdrawals of Army Group South in the battles that followed the Battle of Kursk, the Second Battle of Kiev and the Crimean Offensive in the late summer, autumn and winter of 1943–44, which the Soviets called the Third period of World War II. Operation Suvorov had seen Army Group Centre itself forced to retreat westwards from Smolensk during the autumn of 1943.


By the middle of June 1944, the Western Allies on the Cotentin Peninsula were just over 1,000 km (620 mi) from Berlin, while the Soviet forces at the Vitebsk Gate were within 1,200 km (750 mi) of the German capital. For the Third Reich, the strategic threats were about the same. Hitler underestimated the threat posed by Soviet troops facing Army Group Centre, and had redeployed ⅓ of Army Group Centre's artillery, ½ their tank destroyers and 88% of their tanks to the Southern front where the German high command expected the next major Soviet offensive to come. Army Group center only had a total of 580 tanks, tank-destroyers and assault guns. They were opposed by over 9000 Soviet machines. The redeployment of forces from Army Group Center left only 80 men defending every kilometer of the front line.


Bagration, in combination with the neighbouring Lvov-Sandomierz Offensive launched a few weeks later in Ukraine, allowed the Soviet Union to recapture Belorussia and Ukraine within its 1941 borders, advance into German East Prussia, but more importantly, the Lvov-Sandomierz operation allowed the Red Army to reach the outskirts of Warsaw after gaining control of Poland east of the Vistula river. The operation enabled the next operation, Vistula–Oder Offensive, to come within sight of the German capital. The Soviets were initially surprised at their success of the Belorussian operation which had nearly reached Warsaw. The Soviet advance encouraged the Warsaw uprising against the German occupation forces.

The battle has been described as the triumph of the Soviet theory of "the operational art" because of the complete co-ordination of all the Strategic Front movements and signals traffic to fool the enemy about the target of the offensive. The military tactical operations of the Red Army successfully avoided the mobile reserves of the Wehrmacht and continually "wrong-footed" the German forces. Despite the huge forces involved, Soviet front commanders left their adversaries completely confused about the main axis of attack until it was too late.


5th Guards advance during Operation Bagration

The end of Operation Bagration coincided with the destruction of many of the strongest units of the German Army on the western front in the Falaise pocket in Normandy. The number of troops involved and especially personnel and material losses inflicted on the Wehrmacht was much bigger in Bagration than in Normandy.

After these stunning victories, on both eastern and western fronts, supply problems rather than German resistance slowed the subsequent rapid Allied advance, and it eventually ground to a temporary halt.

However, the Germans were able to transfer armoured units from the Italian front, where they could afford to give ground, to resist the Soviet advance near Warsaw.

29 May 2014

Part 5 D-Day Refought: Merville Battery

D-Day Re-fought: Merville Battery:

 On 6 June 1944, the British 6th Airborne Division was given the task of securing the left flank of the Allied seaborne landings. One of their objectives was the destruction of the Merville Gun Battery. Allied planners had judged from the size of the concrete gun emplacements that the guns must be around 150 mm in calibre. If so, the guns would have a range of about 8 miles (13 km) and could threaten Sword Beach, to the west of Ouistreham, where the British 3rd Infantry Division were due to land later that day.


The Merville Battery was composed of four 6-foot-thick (1.8 m) steel-reinforced concrete gun casemates, each housing a Czech M.14/19 100 mm gun Other buildings on the site included a command bunker, a building to accommodate the men, and ammunition magazines. During a visit on 6 March 1944, to inspect the defences, Field Marshal Erwin Rommel ordered the builders to work faster, and by May 1944, the last two casemates were completed.

The battery was defended by a 20 mm anti-aircraft gun and several machine guns in 15 gun positions, all enclosed in an area 700 by 500 yards (640 by 460 m) surrounded by two barbed wire obstacles 15 feet (4.6 m) thick by 5 feet (1.5 m) high, which also acted as the exterior border for a 100-yard-deep (91 m) minefield. Another obstacle was an anti-tank ditch covering any approach from the nearby coast. The original commander of the battery, Hauptmann Wolter, was killed during a Royal Air Force bombing raid on 19 May 1944. He was replaced by Oberleutnant Raimund Steiner, who commanded 50 engineers and 80 artillerymen from the 1st Battery, Artillery Regiment 1716, part of the 716th Infantry Division.


The unit assigned to destroy the battery was the 9th (Eastern and Home Counties) Parachute Battalion, part of the 3rd Parachute Brigade, commanded by Lieutenant-Colonel Terence Otway. The battalion's normal complement of 600 men was supported by a section of sappers from the Royal Engineers, eight Airspeed Horsa glider loads transporting Jeeps and trailers, and stores including explosives, an anti-tank gun and flamethrowers.


Three of the gliders, transporting 50 volunteers, were to carry out a coup de main landing onto the position to coincide with the ground assault.

Just after midnight on 6 June, the 9th Parachute Battalion's advance party landed with the brigade's pathfinders, and reached the battalion assembly area without any problems. While some men remained to mark out the company positions, the battalion's second in command, Major George Smith, and a reconnaissance party left to scout the battery. At the same time, Royal Air Force Lancaster bombers started their bombing run, which completely missed the battery, their bombs landing further to the south. The pathfinders in the meantime were having problems. Those who had arrived at the correct drop zone found their Eureka beacons had been damaged when they landed, and in the smoke and debris left over from the bombing, their marker lights could not be seen by the pilots of the transport aircraft.


 The main body of the 9th Parachute Battalion and their gliders were to land at drop zone 'V', located between the battery and Varaville from 01:00. However, the battalion was scattered, with a number of paratroopers landing a considerable distance from the designated drop zone. Lieutenant-Colonel Otway landed with the rest of his "stick" 400 yards (370 m) away from the drop zone at a farmhouse being used as a command post by a German battalion; after a brief fire-fight, they helped other scattered paratroopers, and reached the drop zone at 01:30. By 02:50, only 150 men had arrived at the battalion's assembly point with 20 Bangalore torpedoes and a machine gun. The mortars, anti-tank gun, mine detectors, jeeps, sappers and field ambulance section were all missing.


Aware of the time constraints, Otway decided he could wait no longer, and the reduced battalion headed for the battery and joined up with Major Smith's reconnaissance party just outside the village of Gonneville Sur Merville. The reconnaissance party had cut a way through the barbed wire, and marked four routes through the minefield. Otway divided his men into four assault groups, and settled down to await the arrival of the three gliders.

In England, one of the gliders never left the ground, as its tow rope had snapped on taxiing. The other two gliders, unable to locate the battery, did not land where expected.  On their run in, both gliders were hit by anti-aircraft fire. One landed around 2 miles (3.2 km) away, the other at the edge of the minefield. The troops from this glider became involved in a fire-fight with German troops heading to reinforce the battery garrison.


Otway launched the assault as soon as the first glider overshot the battery, ordering the explosives to be detonated to form two paths through the outer perimeter through which the paratroopers attacked. The defenders were alerted by the explosions, and opened fire, inflicting heavy casualties; only four attackers survived to reach Casemate Four, which they disabled by firing into apertures and throwing grenades into air vents. The other casemates were cleared with fragmentation and white phosphorus grenades, as the crews had neglected to lock the doors leading into the battery. During the bombing raid, the battery's guns had been moved inside the casemates and the steel doors left open for ventilation.  During the battle, 22 Germans were killed and a similar number made prisoners of war. The rest of the garrison escaped undetected by hiding in the underground bunkers.


Steiner was not present during the bombing, but at a command bunker in Franceville-Plage. After the raid, he set out for the battery, but was unable to gain entry due to the volume of fire from the British paratroopers. At the same time, a reconnaissance patrol from an army Flak unit with a half-track mounting a large anti-aircraft gun arrived. The crew had intended to seek cover at the position, but instead used the gun to engage the paratroopers.

With the battery in their hands, but no sappers or explosives, the British gathered together what plastic explosives they had been issued for use with their Gammon bombs to try to destroy the guns.

By this time, Steiner had returned to Franceville-Plage, and directed his regiment's 2nd and 3rd Batteries to fire onto the Merville Battery.

Just before 05:00, the battalion's survivors, just 75 men of the 150 who had set out, left the battery and headed for their secondary objective, the village of La Plein. The battalion, being too weak, only managed to liberate around half of the village, and had to await the arrival of the 1st Special Service Brigade later in the day to complete its capture.

After the British had withdrawn, the Germans reoccupied the battery position. Steiner was unable to see Sword Beach from his command bunker, so even though he was able to get two of his guns back in action, he was unable to direct accurate fire onto the landings. However, observers with the 736th Infantry Regiment, holding out at La Brèche, were able to direct his guns until that position was neutralised.

The Merville battle formed a very small part of out D-Day scenario.

Effectively the Airlanding and Paratroops had to control the Orne River Bridges first, before they could advance on the Merville Battery.

The game: 

In our Mini Universe Leutnant Steiner was present from the preliminary bombardment, or if he wasn't, the German succession rule came into play, with a grizzled NCO stepping up; as the Germans were not pinned down. The Allied did not succeed in opening a path through the perimeter defenses.

The Allied paratroops were way off on the first landing, and only managed to arrive on the table in turn 2, and then only near the DZ of the horsa air landing group, directly in the line of fire of line on line of dug in defenders, minefields and barber wire defenses.


On the 3rd turn the 4th Airborne Regt succeeded in landing near Benouville and also to the east of the gun emplacements. Sappers gut the wires, and the Paratroops stormed into the Battery, only to find that the Germans had anticipated this move. 

A Pak 40 was rapidly swung around, and 3 shells tore into the tightly packed Parabats. Just to add to the hail of destruction the reluctant Luftwaffe AA gunners then turned their Flak vierling on the hapless group. 
(just like in te real history)

Several of the gunners also remembered those distant rifle range days, and let their Mausers do the talking. 

If A troop had not left the vecinity of the Benouville bridge they may possibly have given covering fore, and split the defenders' fire, but they were too far away. The confusion closely resembled the actual battle, and misfortunes that befel Otway's men. Lady luck was not smiling on out table-top Paras though.

 Dusk saw the battery still in German hands.


On 7 June, the battery was assaulted again by two troops of commandos from No. 3 Commando, part of the 1st Special Service Brigade. The attack in daylight was repulsed with heavy losses to the commandos. As they withdrew, they were engaged by the battery's guns firing over open sights.

The British never succeeded in completely destroying the battery, and it remained under German control until 17 August, when the German Army started to withdraw from France.

So it was in our alternate universe too.


28 May 2014

D-Day Part 4: Gliders and Parachutes: Pegasus Bridge and the Orne canal: Airborne assault

Re-fighting D-Day: Part 4: 

Airborne landings at Pegasus (Benouville) Bridge over the Orne Canal; and Orne River (Horsa) Bridge, Ranville, Normandy 


Operation Deadstick: D-Day Minus 1 or the Opening Shots, as you wish:

Historical background:

Orne bridges
Pegasus Bridge is a bascule bridge (a type of movable bridge), built in 1934, that crossed the Caen Canal, between Caen and Ouistreham, in Normandy, France.


Also known as the Bénouville Bridge after the neighbouring village, it was, with the nearby Ranville Bridge over the river Orne, a major objective of Operation Deadstick, part of Operation Tonga in the opening minutes of the invasion of Normandy. A glider-borne unit of the British 6th Airborne Division, commanded by Major John Howard, was to land, take the bridges intact and hold them until relieved. The successful taking of the bridges played an important role in limiting the effectiveness of a German counter-attack in the days and weeks following the invasion. Lord Lovatt's Commandos were to Land at Lion-sur-Mer and advance via Ouistreham to relieve the airborne troops. The


In 1944 it was renamed Pegasus Bridge in honour of the operation. The name is derived from the shoulder emblem worn by the British airborne forces, which is the flying horse Pegasus.


Pegasus Bridge and the structure that replaced it in 1994 are examples of a distinct sub type of bascule bridge, the "Scherzer rolling lift bascule bridge" or "rolling bridge". Bridges of this type do not pivot about a hinge point, but roll back on curved tread plates attached to the girders of the main span. This design allows a greater clearance of the waterway for a given opening angle.


German AA 20mm guns. Still in place after 70 years.


Pegasus Bridge from Benouville. Note how close the gliders landed (right)

On the night of 5 June 1944, a force of 181 men, led by Major John Howard, took off from RAF Tarrant Rushton in Dorset, southern England in six Horsa gliders to capture Pegasus Bridge, and also "Horsa Bridge", a few hundred yards to the east, over the Orne River. The force was composed of D Company (reinforced with two platoons of B company), 2nd Battalion, Oxfordshire and Buckinghamshire Light Infantry; 20 sappers, 249 Fd Co. (Airborne); and men of the Glider Pilot Regiment. The object of this action was to prevent German armour from crossing the bridges and attacking the eastern flank of the landings at Sword Beach.


Coup De Main: Five of the Ox and Bucks's gliders landed as close as 47 yards from their objectives from 16 minutes past midnight. The attackers poured out of their battered gliders, completely surprising the German defenders, and took the bridges within 10 minutes. They lost two men in the process.


One glider, assigned to the capture of the river bridge, landed at the bridge over the River Dives, some 7 miles off. Most of the soldiers in this glider moved through German lines towards the village of Ranville where they eventually re-joined the British forces. The Ox & Bucks were reinforced half-an-hour after the landings by Major Pine-Coffin's 7th Parachute Battalion, and linked up with the beach landing forces with the arrival of Lord Lovat's Commandos. (Kieffer batallion)

The bridge in Allied hands


Paratroops assembling the Mini Motorcycles used as transport

What happened in our Miniature Universe:

Wild Cards: Allied Players rolled +1 to reinforcement rolls; Axis player rolled the same
03.00 6 June 1944
Turn one. Allied Goes first per rules

The night time peace in Benouville was shattered by the thunder of exploding bombs and the drone of high altitude bombers overhead from midnight.

Hans Friedrichsen of the 716. Infanterie Division nodded at his comrade in arms, leaning on the barrel of his 20 mm AA gun at the bridge: "The poor guys over in Merville seem to be getting a pasting tonight. The verdamte RAF must be targeting their battery. Thank goodness we only have this small gun! We may even get some rest tonight!"

" Pity poor ol'  Leutnant Steiner ! He may go the same way Hauptmann Wolter did !" A guffaw came out of the dark. "Ja, but then I won't mind going the way he did! In bed, with a warm French Liebling! Not a bad way to cash in your ticket!"

His wish was not to be. Silently, 3 Gliders dropped down out of the ink black sky, coming to rest hardly 30 metres away from the bridge. "Achtung! Alarm! Alarm" he shouted, bringing his 20 mm to bear on the Horsa glider closest to the bridge. Dark figures spilled out, and the chatter of small arms fire was heard. He emptied the first ammunition clip on the advancing figures. One or two went down. Then they were upon him.


The Allies landed both a glider party and one paratroop party (Ox and Bucs) near the bridge over the Orne River at Ranville and the bridge over the Canal at Benouville. One set of pathfinders missed the drop-zone and was unable to take part in the first move as a result

The Germans had 2 Heavy machine guns placed at the approaches to the bridges, and when the first shots fell they stirred from their slumber. Being trained veterans they passed their pinning tests almost without exception, and were able to return fire an the Glider troops.Being dug in and gone to ground casualties were light. The gliders had landed in such a fashion that they did not provide much cover for the troops. They immediately went to ground.

The Germans raised the alarm in their turn, and successfully called up a unit of K-Rad Fahrer, who roared across the bridge on their BMW and Zundapp Motorcycles, MG 42s blazing. Lucky for the Brits only 2 LMGs were in rang.  A unit of medium mortars were dug in halfway between the two bridges. They started raining down shrapnel on the Tommies.


The Orne Canal bridge, with 20mm Cannon and unit of Krad Schutzen racing over the bridge to engage the Brit. Paratroops and Air Landing Troops


By Turn 2 only the command group of the 1st air landing platoon was still standing (or rather, dug in)
Reinforcements arriving and forming on their pathfinder, ready to take on the Hun! (Photo Roly Hermans)

Turn 2 saw more glider and paratroop landings. The lost Ox and Bucs paratroop unit still had not found its way onto the table, but another glider landed next to the bridge, and yet another was blow off course, failing to reach the DZ. Presumably this is the glider that landed at the River Dives. 4th Reg. Paratroops landed successfully at the Benouville side of the bridge, but the 716.ID provided stiff resistance.


View towards Benouville from Ouistreham and Merville at the far left. LZ for the planner Coup de Main at Right. To the left the 4th Para Regt. taking on the 716. Inf Div defenders, eventually routing and annihilating the unit, at the expense of not taking their objective, the bridge.


The Merville battery: 20mm AA and dug in medium mortars, twin AAs and Pak 40, Quad vierling 20mm, minefields. Formidable defenses. This is what faced the landing groups that overshot the Orne canal bridge in their landing. A very hard nut to crack!

The glider troops were now caught "in der kessel"; (in the pot)  ready for the "Kesselschlag" : Two pincers and bombarded by medium mortars, HMG, 20mm cannon and LMG on the northern flank, K-Rad Zug with 5 LMGs (and mobile) in the south. They resisted well, but at the end of play (German turn 3) it was clear that they were not going to take the bridges, and were hanging on by the skin of their teeth.

"Where was Lord Lovatt and his Commandos? and the Shermans the Hussars had promised? What, still on the beach! What are they doing? Sun bathing? "

"...Are those Stugs bearing down on us now?"

Even the stragglers eventually turning up on the table with  mortars and Brens did not assist in taking the bridges. To little, too late! The Germans were too well dug in. Supporting fire from the Merville battery also did not help! It is no fun having a quad vierling 20mm AA gun turned on you! And a Pak 40 firing 3 rounds per turn!

... Also, the 4th Parachute regiment went off on a tangent: Chased down and destroyed a unit of 716.Inf Div in harsh hand-to-hand assault: Gerry that turned tail on the Benouville side of the Bridge.

 "Oi! What about the objective!"
"What?"
"The objective!  The Allies could have taken this one!"
Well, at least the Benouville Bridge, was it not for a tactical decision in the heat of battle...

"Clear and imminent danger, you say? OK. I'll give you that."