Battle Anniversaries: Bannockburne
This year and next year sees the anniversary of many significant historical battles.
In the last year we've marked a few major armed clashes:
Kursk, D-Day, with many other favourites of wargamers to come (Eastern and Western Front, Ardennes offensive, and the Battle for Berlin, and Waterloo to come too!
(Oops, we somehow missed Anzio's 70th and Bannockburne's 700th anniversary ?!)
As usual distilled from the Internet: No copyright infringement intended, happy to credit and/or remove images
Bannockburne:

I opened my latest copy of Wargames Soldiers and Strategy, (BTW a great Dutch publication (in English); one of the few that also include 40K!); to find a fantastic write-up on the battle, and also it's playability with various rule sets! It turns out it was almost 2 battles rolled in one, and that the Scots employed tactics quite of character for the time, catching the over-confident English off-side!
The Battle of Bannockburn (24 June 1314) was a significant Scottish victory in the First War of Scottish Independence, and a landmark in Scottish history.
Stirling Castle, a Scots royal fortress, occupied by the English, was under siege by the Scottish army. Edward II of England assembled a formidable force to relieve it. This attempt failed, and his army was defeated in a pitched battle by a smaller army commanded by Robert I of Scotland.
The Wars of Scottish Independence between England and Scotland began in 1296 and initially the English were successful, having won victories at the Dunbar (1296) and at Berwick (1296).
The removal of John Balliol from the Scottish throne also contributed to the English success. The Scots had been victorious in defeating the English at the Battle of Stirling Bridge in 1297, however this was countered by Edward I of England's victory at the Battle of Falkirk (1298).By 1304 Scotland had been conquered, but in 1306 Robert the Bruce seized the Scottish throne and hostilities resumed.

Robert the Bruce
Edward II of England came to the throne in 1307 but was incapable of providing the determined leadership that had been shown by his father, Edward I. Stirling Castle was held by the English, commanding the route north into the Scottish Highlands. It was besieged in 1314 by Robert the Bruce's brother, Edward Bruce, with a threat that if the castle was not relieved by mid-summer then it would be surrendered to the Scots.
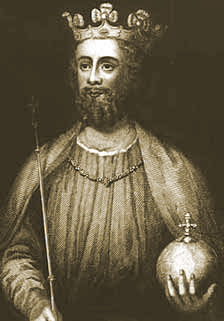
Edward II
The English could not ignore this challenge and preparations were made for a substantial campaign in which the English army probably numbered 2,000 cavalry and 15,000 infantry, many of them the feared longbowmen. The Scottish army probably numbered between 7,000 and 10,000 men, of whom no more than 500 would have been mounted. Unlike the heavily armoured English cavalry, the Scottish cavalry would have been light horsemen who were good for skirmishing and reconnaissance but were not suitable for charging the enemy lines.The Scottish infantry would have had axes, swords and pikes, with few bowmen among them, not in separate units.

Scottish Cavalry, comparatively light and maneuvrable
The precise size of the English force relative to the Scottish forces is unclear but estimates range from as much as at least two or three times the size of the army Bruce had been able to gather, to as little as only 50% larger.

Edward II and his advisors were aware of the places that the Scots were likely to challenge them and sent out orders for their troops to prepare for an enemy established in boggy ground near to the River Forth, near Stirling. The English advanced in four divisions whereas the Scots were in three divisions, known as 'schiltrons' which were strong defensive circles of men bristling with pikes. Thomas Randolph, 1st Earl of Moray, commanded the Scottish vanguard, which was stationed about a mile to the south of Stirling, near the church of St. Ninian, while the king commanded the rearguard at the entrance to the New Park. His brother Edward led the third division.

According to Barbour, there was a fourth division nominally under the youthful Walter the Steward, but actually under the command of Sir James Douglas. The Scottish archers used yew-stave longbows and though these were not weaker or inferior to English longbows, there were fewer Scottish archers than English archers, possibly numbering only 500. These archers played little part in the battle, as it turned out. There is first hand evidence from the captured Carmelite friar, Robert Baston in his poem, written just after the battle, that one or both sides employed slingers and crossbowmen.
The Battle
Site: There is some confusion over the exact site of the Battle of Bannockburn, although most modern historians agree that the traditional site, where a visitor centre and statue have been erected, is not the correct one. Although a large number of possible alternatives have been proposed, most can be dismissed leaving two serious contenders:
1. An area of peaty ground known as the Dryfield outside the village of Balquhiderock, about three-quarters of a mile to the east of the traditional site, and
2. the Carse of Balquhiderock, about a mile and a half north-east of the traditional site, accepted by the National Trust as the most likely candidate.


Robert the Bruce at Bannockburn
First day of battle:

Most medieval battles were short-lived, lasting only a few hours, therefore the Battle of Bannockburn is unusual in that it lasted for two days. On 23 June 1314 two of the English cavalry formations advanced, the first commanded by the Earl of Gloucester and the Earl of Hereford. They encountered a body of Scots, among them Robert the Bruce himself. A celebrated single combat then took place between Bruce and Henry de Bohun who was the nephew of the Earl of Hereford. Bohun charged at Bruce, hoping to make a name for himself and when the two passed side by side, Bruce split Bohun's head with his axe. De Bohun went down in history for a reason quite unlike he had planned!

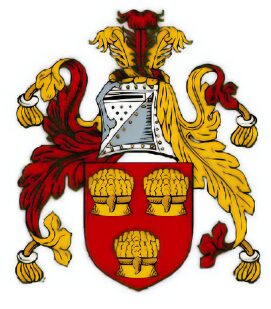
(De BoHun's Livery is incorrect in this image, correct below)


Models with more accurate colours: His son Humphrey de Bohun, Earl of Hereford, captured
Coat of Arms: Azure a bend argent coticed between six lions rampant or Source: The Falkirk Roll
The Scots then rushed upon the English under Gloucester and Hereford who struggled back over the Bannockburn. The second English cavalry force was commanded by Robert Clifford. They advanced on the flank of the Scots, towrds St Ninians, coming up against the schiltrom that was commanded by Thomas Randolph, 1st Earl of Moray. The English were unable to break the barrier of spears and pikes, and the English withdrew in confusion, unable to break the Scottish formation.

Modern re-enactment
Second day of battle

Under nightfall the English forces crossed the stream that is known as the Bannock Burn, establishing their position on the plain beyond it. A Scottish knight, Alexander Seton, who was fighting in the service of Edward II of England, deserted the English camp and told Bruce of the low English morale, encouraging Bruce to attack them. In the morning the Scots then advanced from New Park. The English archers should have been able to counter this advance but they were neutralized by a Scottish cavalry charge led by Sir Robert Keith.
The English responded to the Scots advance with a charge of their own, led by the Earl of Gloucester. Gloucester had argued with the Earl of Hereford over who should lead the vanguard into battle, and argued with the king that the battle should be postponed. This led the king to accuse him of cowardice, which perhaps goaded Gloucester into the charge. Few accompanied Gloucester in his charge and when he reached the Scottish lines he was quickly surrounded and killed.

Gradually the English were pushed back and ground down by the Scots' schiltrons. An attempt to employ the English and Welsh longbowmen to shoot at the advancing Scots from their flank failed when they were dispersed by the Scottish 500-horse light cavalry under the Marischal Sir Robert Keith
The English cavalry was hemmed in making it difficult for them to maneuver. As a result the English were unable to hold their formations and broke ranks. It soon became clear that the English had lost and Edward II needed to be led to safety. However one of Edward's knights, Giles de Argentine, declared that he was not accustomed to flee and made one final charge on the Scots, only to die on their spears.
Edward fled with his personal bodyguard, ending the remaining order in the army; panic spread and defeat turned into a rout. He arrived eventually at Dunbar Castle, from which he took ship to England.
From the carnage of Bannockburn, the rest of the army tried to escape to the safety of the English border, ninety miles to the south. Many were killed by the pursuing Scottish army or by the inhabitants of the countryside that they passed through.
Historian Peter Reese says that, "only one sizeable group of men—all foot soldiers—made good their escape to England." These were a force of Welsh spearmen who were kept together by their commander, Sir Maurice de Berkeley, and the majority of them reached Carlisle. Weighing up the available evidence, Reese concludes that "it seems doubtful if even a third of the foot soldiers returned to England." Out of 16,000 infantrymen, this would give a total of about 11,000 killed. The English chronicler Thomas Walsingham gave the number of English men-at-arms who were killed as 700, while 500 more men-at-arms were spared for ransom. The Scottish losses appear to have been comparatively light, with only two knights among those killed.
Aftermath
The defeat of the English opened up the north of England to Scottish raids and allowed the Scottish invasion in Ireland. These finally led, after the failure of the Declaration of Arbroath to reach this end by diplomatic means, to the Treaty of Edinburgh–Northampton. It was not until 1332 that the Second War of Scottish Independence began with the Battle of Dupplin Moor, followed by the Battle of Halidon Hill (1333) which were won by the English.
Notable casualties
Deaths
Gilbert de Clare, 8th Earl of Gloucester:

Sir Giles d'Argentan:

John Lovel, 2nd Baron Lovel

John Comyn, the Red Lord of Badenoch
Robert de Clifford, 1st Baron de Clifford
Sir Henry de Bohun

William le Marshal, Marshal of Ireland
Edmund de Mauley, King's Steward
Sir Robert de Felton of Litcham, 1st Lord
Captives
Humphrey de Bohun, 4th Earl of Hereford
John Segrave, 2nd Baron Segrave
Maurice de Berkeley, 2nd Baron Berkeley
Thomas de Berkeley
Sir Marmaduke Tweng
Ralph de Monthermer, 1st Baron Monthermer
Robert de Umfraville, Earl of Angus
Sir Anthony de Luci
Sir Ingram de Umfraville

.jpg)


