ANZAC DAY: Remembering those who have fallen:
WW1 and Delville Wood

ANZAC day is the marking of a Day of Remembrance in Australia and New Zealand.
2014 marks a century since the outbreak of hostilities that led to the Great War
ANZAC particularly remembers the fateful events of Gallipoli, and the fruitless waste of young lives.

In South Africa the equivalent of NZ/Au's Gallipoli is Delville Wood.
Delville Wood was SA's first taste of the horrors of modern warfare. The South African Brigade took part in the Somme Battle, and in a refrain that became too familiar in battles to follow (El Alamein, Sidi Regez, etc) colonial troops were thrown into the breach of the European powers' battles, in this case, suffering up to 80% casualties. Here is there story:

The offensive had evolved to the capture of small prominent towns, woods or features which offered either side slim tactical advantage, observation for direct artillery fire or safety from which to launch further attacks.
Delville Wood was one such feature, making it strategically important to both German and Allied forces. As part of a large offensive starting on 14 July, General Douglas Haig, Commander of the British Expeditionary Force intended to secure the British right flank, while the centre advanced to capture the higher lying areas of High Wood in the centre of his line. Taking Delville Wood was an attempt to secure this right flank.
The battle achieved this objective and is historically considered a tactical Allied victory. However, it was one of the bloodiest confrontations of the Somme, with both sides incurring large casualties. This tactical victory needs to be measured against the losses sustained, as well as the fact that the British advance to the north had made only marginal gains by the end of the battle.
The battle is of particular importance to South Africa, as it was the first major engagement entered into on the Western Front by the South African 1st Infantry Brigade, which also contained a contingent of Southern Rhodesians.

The casualties sustained by this Brigade were of catastrophic proportions, comparable to those encountered by Allied battalions on the first day of the Somme. On the Western Front, units were normally considered to be incapable of combat if their casualties had reached 30% and they were withdrawn once this level had been attained.
Before deployment. Note that steel helmets had been issued.
A practice that only started in 1916 during the Battle of the Somme.
The South African Brigade suffered losses of as high as 80%, yet they managed to hold the Wood as ordered. This feat has been described as "...the bloodiest battle hell of 1916."
The South African Brigade
BackgroundThe political situation in South Africa in 1914 was very different to the other nations of the British Empire.
Canada had been obtained from the French in 1763 and Australia and New Zealand had been colonised without any great interference from rival empires (Nobody was, of course was much interested in what the actual indigenous inhabitants thought about the process. The European powers were bringing them civilisation, after all; whilst taking away anything of value that their land had to offer...)
The Union of South Africa was only four years old, and had not long since finished a bitter war between the British and the Boers (1899-1902).
There was not a great deal of desire amongst either the Boer ( Dutch extraction) or the African population of SA to rush off and defend Great Britain which had, within living memory, been responsible for the deaths of thousands of people.
However, General Louis Botha, a former commander of the Boers, led the Union Defence Forces on a campaign into German South West African in September 1914. This was rapidly brought to a successful conclusion. The South African forces were having a harder time in German East Africa, where they were confronted by General Paul Von Lettow-Vorbeck (Who was still leading the dance, when the war in Europe came to an end).
In theory, South Africans, though liable for military service as British subjects, were not required to serve overseas. This technicality was worked around in April 1915 by the simply asking for volunteers.
Enough men came forward to form the 1st South African Infantry Brigade under Brigadier General Tim Lukin. The Brigade, was made up of four regiments:
1st South African Infantry (Cape Province)
2nd South African Infantry (Natal and Orange Free State)
3rd South African Infantry (Transvaal and Rhodesia)
4th South African Infantry (South African Scottish)

Arrival in Marseilles, with the 4th SAI mascot in tow
After spending some time in Egypt the Brigade returned to France on 20th April 1916, destined for the Western Front where it was attached to the 9th (Scottish) Division.
It would serve with distinction throughout the war and remained with the Scots until the summer of 1918 when it had been so depleted by fighting that it had to be recalled to England and re-formed. It was back in France in September 1918 but this time with the 66th (Lancashire) Division.
Delville Wood: The Great Slaughter of 1916
Troops on the Western front compromised Kitchener's 'New Army': Territorial forces, from all parts of the British Empire. While steel helmets were issued to most soldiers, a "luxury" first introduced at Loos, replacements had little training and were without any combat experience. Soldiers were "mostly civilians in khaki, hastily trained and thrown into battle" - lives wasted.The Battle of the Somme commenced on the 1st of July 1916.
It was a " fierce and complex Battle" involving many units and no small task. A "dreadful slogging match and conditions within the wood were appalling, with death and danger everywhere". The artillery had "reduced the trees to a morass of splintered wood making movement virtually impossible. It was fought at close hand with bombs and bayonets." Mud and water covered bodies; many still remain in the wood today.
"The wood had to be cleared of Germans before any attack could be launched on the formidable and notorious, German Switch Line." The orders - Take it "at all costs": It took over 6 days and 5 nights.
As with many other attacks, the wood was heavily shelled by Allied artillery before infantry troops went in.
The southern sector of the wood was quickly cleared of Germans. The officer overseeing the attack, Tanner, reported back to his headquarters in the evening of the 15th that all of the wood had been taken except the northwest near the town of Longueval.
In fact, the South Africans were in a very precarious position as they faced over 7,000 Germans. The artillery shelling had pushed over trees and exposed their roots. This made it very difficult to dig trenches. The South Africans were not only up against a larger force but had to survive in ‘trenches’ that had little depth and gave minimal protection especially against German artillery attacks.
The terrain all but dictated that most of the combat within the wood was hand-to-hand fighting and casualties were high. The terrain would have made it difficult to move the wounded back to a medical station. However, such was the ferocity of the fighting in this phase of the battle that for every one South African wounded, four were killed. The South Africans fought within the wood until July 19th when they were relieved. Their casualties were some of the worst seen on the Western Front.
(I intend to post a fuller description of the battle later this week.)
Captain S. J. Worsley, MC:
“Every semblance of a trench seemed full of dead-sodden, squelchy, swollen bodies. Fortunately the blackening faces were invisible except when Verey lights lit up the indescribable scene. Not a tree stood whole in that wood. Food and water were very short and we had not the faintest idea when any more would be obtainable.
We stood and lay on putrefying bodies and the wonder was that the disease (dysentery) did not finish off what the shells of the enemy had started. There was hand-to-hand fighting with knives, bombs (grenades) , and bayonets; cursing and brutality on both sides such as men can be responsible for when it is a question of "your life or mine"; mud and filthy stench; dysentery and unattended wounds; shortage of food and water and ammunition.”
A German officer who fought at Delville Wood described it as:
“Delville Wood had disintegrated into a shattered wasteland of shattered trees, charred and burning stumps, craters thick with mud and blood, and corpses, corpses everywhere. In places they were piled four deep.”
The Germans responded to the attack by shelling areas of the wood captured by the Allies. At its peak it is thought that 400 German shells landed in Delville Wood every minute. Combined with frequent raid rain, the wood was not only churned up with regards to trees but it also became a quagmire.


The Springbok mascot survived the carnage
It is thought that German casualties matched Allied casualties but loss of records makes this hard to verify. The South Africans had 3,155 men at the start of the attack and suffered 2,536 casualties by the time they were relieved. This represented a loss of 80% - killed, wounded and missing. 104 officers out of a total of 123 were killed, wounded or missing – nearly 85%.

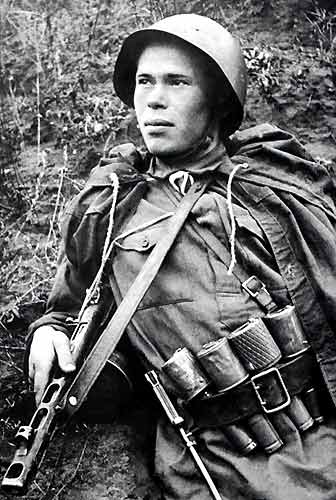
The lucky few: Relieved survivors being withdrawn
Private William Faulds (SA)
Sergeant Albert Gill (UK)
Private Albert Hill (UK)
Corporal Joseph Davies (UK)
Delville Wood was only finally fully cleared of Germans on September 3rd 1916.
Because of German counter attacks, this whole area was an awful 'killing field' - "flies rose in dense black clouds round us… exhaustion did what shell-fire failed… we collapsed in our trenches, spent in body and worn out in spirit… the task set was too great for us".
The Germans recaptured Delville Wood in March 1918 as part of their Spring Offensive.
During the Allies advance after the Spring Offensive had failed, the 38th Welsh Infantry Division fought for it and captured the wood in August 1918.
Losses
South African:
- Strength at start of battle: Officers 123 Other ranks 3032
- Killed 457
- Wounded 1476
- Unaccounted (Missing) 483
- Total casualties: 2536
- Unit strength at close of battle: Officers 19 Other ranks 600
Both the Allies and German forces sustained extremely heavy losses, the 9th Division had lost 314 officers and 7,203 other ranks between 1 and 20 July. Details of the German losses are scarce, especially those of the Prussian divisions which played an important role in the battle, due to the loss of archive documents caused by the Allied strategic bombing campaign of World War II—particularly the raids on Potsdam in 1945. The German 26th Regiment (the equivalent of an Allied Brigade) which had been at a war establishment strength on 13 July had only 10 officers and 250 other ranks after the battle.
The question has frequently been asked as to why the South Africans remained in the wood only to be slaughtered by artillery fire. This was not the intention of the commanders:

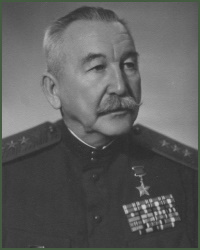
Henry Lukin
Brigadier-General Lukin’s post battle report stated that "My intention was to thin out the troops in the Wood as soon as the perimeter was seized, leaving the machine-guns with small detachments of infantry to hold it. The enemy, by launching counter-attacks at once, prevented this intention being carried out and Lieut-Col Tanner reported that he required all the men under his command to hold off the enemy."
Losses sustained by the South African Brigade may have frequently been over-stated. When considering the claimed South African total casualties, a number of factors need to be considered:
Casualties which had been sustained by the South African Brigade at Bernafay Wood and Maricourt before 14 July (the date of entering Delville Wood) are frequently, erroneously added to the Delville Wood casualties;
Casualties sustained by the 1st and 4th Battalions in Longueval on 14 July are also sometimes incorrectly added to the Delville Wood totals;
Of the three officers and 140 men who left Delville Wood on 20 July, less than half had entered the wood on 14 / 15 July, and were replacement troops which had been sent in between 16 and 20 July. According to Col. Thackeray, a total of 199 reinforcements had been received in the wood.
The Brigade headquarters and staff had not deployed into the wood, and as such the total brigade staff at the start of the battle were not necessarily all in the wood.
Additional troops (in addition to the 3 officers and 140 men who had withdrawn on 20 July) reported to Happy Valley for the muster parade of 21 July. So did the Brigade and Machine Gun Company staff.