17 July 2014

Separatist Cossacks blamed for shooting down Malaysian Airliner

Evidence that the Air Malaysia jet was shot down by a missile points to Donyetsk Cossack Rebels


It appears a SA-11 or SA-17 (BUK) Surface to air missile was used by Ukranian separatist rebels to down the ill-fated Malaysian airliner earlier today.


Internet sleuths quickly pointed the finger to Donyetsk rebels. Intercepted mobile phone conversations suggest that a Cossack Unit operating a SA-11 or SA-17 missile launching vehicle may have been responsible for shooting down the airliner and killing almost 300 innocent civilians. It is suspected that this is the same crew that downed a military transport earlier in the week.

Sources in the area claim to have taken a video of the crew departing with the launcher, which was reportedly captured in the preceding weeks, and the news celebrated in the Russian press.

Click on the link to the Aircraft Nut blog for the whole story and more images

15 July 2014

Anniversaries of Major Battles

Battle Anniversaries: Bannockburne


This year and next year sees the anniversary of many significant historical battles.
In the last year we've marked a few major armed clashes:

Kursk, D-Day, with many other favourites of wargamers to come (Eastern and Western Front, Ardennes offensive, and the Battle for Berlin, and Waterloo to come too!

 (Oops, we somehow missed Anzio's 70th and Bannockburne's 700th anniversary ?!)

As usual distilled from the Internet: No copyright infringement intended, happy to credit and/or remove images

Bannockburne:


I opened my latest copy of Wargames Soldiers and Strategy, (BTW a great Dutch publication (in English); one of the few that also include 40K!); to find a fantastic write-up on the battle, and also it's playability with various rule sets! It turns out it was almost 2 battles rolled in one, and that the Scots employed tactics quite of character for the time, catching the over-confident English off-side!

The Battle of Bannockburn  (24 June 1314) was a significant Scottish victory in the First War of Scottish Independence, and a landmark in Scottish history.

Stirling Castle, a Scots royal fortress, occupied by the English, was under siege by the Scottish army. Edward II of England assembled a formidable force to relieve it. This attempt failed, and his army was defeated in a pitched battle by a smaller army commanded by Robert I of Scotland.

The Wars of Scottish Independence between England and Scotland began in 1296 and initially the English were successful, having won victories at the  Dunbar (1296) and at Berwick (1296).

The removal of John Balliol from the Scottish throne also contributed to the English success. The Scots had been victorious in defeating the English at the Battle of Stirling Bridge in 1297, however this was countered by Edward I of England's victory at the Battle of Falkirk (1298).By 1304 Scotland had been conquered, but in 1306 Robert the Bruce seized the Scottish throne and hostilities resumed.


Robert the Bruce

Edward II of England came to the throne in 1307 but was incapable of providing the determined leadership that had been shown by his father, Edward I. Stirling Castle was held by the English, commanding the route north into the Scottish Highlands. It was besieged in 1314 by Robert the Bruce's brother, Edward Bruce, with a threat that if the castle was not relieved by mid-summer then it would be surrendered to the Scots.

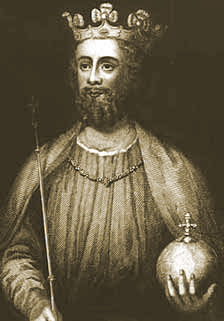
Drawing of Edward the Second

Edward II

The English could not ignore this challenge and preparations were made for a substantial campaign in which the English army probably numbered 2,000 cavalry and 15,000 infantry, many of them the feared longbowmen. The Scottish army probably numbered between 7,000 and 10,000 men, of whom no more than 500 would have been mounted. Unlike the heavily armoured English cavalry, the Scottish cavalry would have been light horsemen who were good for skirmishing and reconnaissance but were not suitable for charging the enemy lines.The Scottish infantry would have had axes, swords and pikes, with few bowmen among them, not in separate units.


Scottish Cavalry, comparatively light and maneuvrable

The precise size of the English force relative to the Scottish forces is unclear but estimates range from as much as at least two or three times the size of the army Bruce had been able to gather, to as little as only 50% larger.

Edward II and his advisors were aware of the places that the Scots were likely to challenge them and sent out orders for their troops to prepare for an enemy established in boggy ground near to the River Forth, near Stirling. The English advanced in four divisions whereas the Scots were in three divisions, known as 'schiltrons' which were strong defensive circles of men bristling with pikes. Thomas Randolph, 1st Earl of Moray, commanded the Scottish vanguard, which was stationed about a mile to the south of Stirling, near the church of St. Ninian, while the king commanded the rearguard at the entrance to the New Park. His brother Edward led the third division.


According to Barbour, there was a fourth division nominally under the youthful Walter the Steward, but actually under the command of Sir James Douglas. The Scottish archers used yew-stave longbows and though these were not weaker or inferior to English longbows, there were fewer Scottish archers than English archers, possibly numbering only 500. These archers played little part in the battle, as it turned out. There is first hand evidence from the captured Carmelite friar, Robert Baston in his poem, written just after the battle, that one or both sides employed slingers and crossbowmen.


The Battle
Site: There is some confusion over the exact site of the Battle of Bannockburn, although most modern historians agree that the traditional site, where a visitor centre and statue have been erected, is not the correct one. Although a large number of possible alternatives have been proposed, most can be dismissed leaving two serious contenders:
1. An area of peaty ground known as the Dryfield outside the village of Balquhiderock, about three-quarters of a mile to the east of the traditional site, and
2. the Carse of Balquhiderock, about a mile and a half north-east of the traditional site, accepted by the National Trust as the most likely candidate.


Robert the Bruce at Bannockburn

First day of battle:


Most medieval battles were short-lived, lasting only a few hours, therefore the Battle of Bannockburn is unusual in that it lasted for two days. On 23 June 1314 two of the English cavalry formations advanced, the first commanded by the Earl of Gloucester and the Earl of Hereford. They encountered a body of Scots, among them Robert the Bruce himself. A celebrated single combat then took place between Bruce and Henry de Bohun who was the nephew of the Earl of Hereford. Bohun charged at Bruce, hoping to make a name for himself and when the two passed side by side, Bruce split Bohun's head with his axe. De Bohun went down in history for a reason quite unlike he had planned!


(De BoHun's Livery is incorrect in this image, correct below)


Models with more accurate colours: His son Humphrey de Bohun, Earl of Hereford, captured 
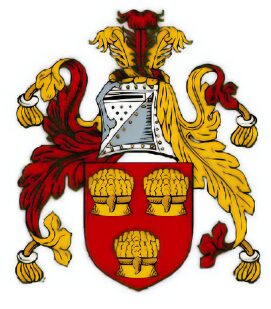
Coat of Arms: Azure a bend argent coticed between six lions rampant or Source: The Falkirk Roll 


The Scots then rushed upon the English under Gloucester and Hereford who struggled back over the Bannockburn. The second English cavalry force was commanded by Robert Clifford. They advanced on the flank of the Scots, towrds St Ninians, coming up against the schiltrom that was commanded by Thomas Randolph, 1st Earl of Moray. The English were unable to break the barrier of spears and pikes, and the English withdrew in confusion, unable to break the Scottish formation.


Modern re-enactment


Second day of battle


Under nightfall the English forces crossed the stream that is known as the Bannock Burn, establishing their position on the plain beyond it. A Scottish knight, Alexander Seton, who was fighting in the service of Edward II of England, deserted the English camp and told Bruce of the low English morale, encouraging Bruce to attack them. In the morning the Scots then advanced from New Park. The English archers should have been able to counter this advance but they were neutralized by a Scottish cavalry charge led by Sir Robert Keith.

 The English responded to the Scots advance with a charge of their own, led by the Earl of Gloucester. Gloucester had argued with the Earl of Hereford over who should lead the vanguard into battle, and argued with the king that the battle should be postponed. This led the king to accuse him of cowardice, which perhaps goaded Gloucester into the charge.  Few accompanied Gloucester in his charge and when he reached the Scottish lines he was quickly surrounded and killed.


 Gradually the English were pushed back and ground down by the Scots' schiltrons. An attempt to employ the English and Welsh longbowmen to shoot at the advancing Scots from their flank failed when they were dispersed by the Scottish 500-horse light cavalry under the Marischal Sir Robert Keith

 The English cavalry was hemmed in making it difficult for them to maneuver. As a result the English were unable to hold their formations and broke ranks. It soon became clear that the English had lost and Edward II needed to be led to safety. However one of Edward's knights, Giles de Argentine, declared that he was not accustomed to flee and made one final charge on the Scots, only to die on their spears.

Edward fled with his personal bodyguard, ending the remaining order in the army; panic spread and defeat turned into a rout. He arrived eventually at Dunbar Castle, from which he took ship to England.

From the carnage of Bannockburn, the rest of the army tried to escape to the safety of the English border, ninety miles to the south. Many were killed by the pursuing Scottish army or by the inhabitants of the countryside that they passed through.

Historian Peter Reese says that, "only one sizeable group of men—all foot soldiers—made good their escape to England." These were a force of Welsh spearmen who were kept together by their commander, Sir Maurice de Berkeley, and the majority of them reached Carlisle. Weighing up the available evidence, Reese concludes that "it seems doubtful if even a third of the foot soldiers returned to England." Out of 16,000 infantrymen, this would give a total of about 11,000 killed. The English chronicler Thomas Walsingham gave the number of English men-at-arms who were killed as 700, while 500 more men-at-arms were spared for ransom. The Scottish losses appear to have been comparatively light, with only two knights among those killed.

Aftermath
The defeat of the English opened up the north of England to Scottish raids and allowed the Scottish invasion in Ireland. These finally led, after the failure of the Declaration of Arbroath to reach this end by diplomatic means, to the Treaty of Edinburgh–Northampton. It was not until 1332 that the Second War of Scottish Independence began with the Battle of Dupplin Moor, followed by the Battle of Halidon Hill (1333) which were won by the English.

Notable casualties
Deaths
Gilbert de Clare, 8th Earl of Gloucester:


Sir Giles d'Argentan:


John Lovel, 2nd Baron Lovel


John Comyn, the Red Lord of Badenoch

Robert de Clifford, 1st Baron de Clifford

Sir Henry de Bohun


William le Marshal, Marshal of Ireland
Edmund de Mauley, King's Steward
Sir Robert de Felton of Litcham, 1st Lord

Captives
Humphrey de Bohun, 4th Earl of Hereford
John Segrave, 2nd Baron Segrave
Maurice de Berkeley, 2nd Baron Berkeley
Thomas de Berkeley
Sir Marmaduke Tweng
Ralph de Monthermer, 1st Baron Monthermer
Robert de Umfraville, Earl of Angus
Sir Anthony de Luci
Sir Ingram de Umfraville

14 July 2014

Haka Farewell from the CO of the disbanded UK 3rd Mercier (Staffordshire) Sappers

Another Strange Turn: Kiwi Commander does Haka as UK Sapper Unit disbands

Just last night I was reading from D'Ami's World Uniforms, two volumes of colour plates of Military  ceremonial dress, written back  in the 1960s. Quite a bit dated now, but still a great reference work.


I was really looking for pictures of Napoleonic dress, as I'm plotting a Waterloo army for the bicentenary next year. Anyhow, to make a long story short, quite a lot was made in these two volumes of the value of the sapper, pioneer and farrier in the military of old, and how this is (was) recognised. Many of the plates depict the sappers, wearing ceremonial leather aprons, and carrying axes over their shoulders, as an important part of the ceremonial garb of many British Military Units at the time

Strangely enough, today there's an article and video on the British 32nd Engineer (Sapper) Unit being disbanded after returning from Afganistan in today's news! The troops were mainly Fijian, and felt compelled to farewell their commanding officer with their traditional Cibi war challenge, only to find their CO, a New Zealander, answer them with "Ka Mate", Te Rauparaha's Haka, which has become the All Black Rugby Team and NZ's national haka (War challenge); in suitable fashion.


The troops performed the Cibi, an old Fijian meke war dance. The Colonel responded with Ka Mate, the haka written by Te Rauparaha, which is quite appropriate for a Sapper as the Musket Wars saw the early development of Pa fortifications ( http://en.wikipedia.org/wiki/Pā_(Māori) ) which caused the Brits no end of trouble during the Land Wars.

The Haka  continues to play an important role in military life in NZ as evident today, and in both world wars:


WW1: NZ Pioneer Battalion performing a haka on the Western Front


NZ 28th (Maori) Battalion  in Egypt WW2


The Māori Battalion performs a haka – a well-known Te Arawa peruperu (war dance with weapons) – for the exiled King of Greece in Helwan, Egypt, in June 1941. 

The battalion had recently been evacuated from Greece and Crete, following fierce battles against the invading Germans. The Māori Battalion went on to serve throughout the North African campaigns of 1941 to 1943. It suffered heavy casualties but its men gained an outstanding reputation as soldiers.


Afghanistan 2005

Distilled from Stuff today and the Net (Link to report and video below): 

A British Army warrior has fare-welled his soldiers with a striking solo haka.

Delivered in perfect Te Reo (Maori), Lieutenant Colonel Steven Davies' performance came as a big surprise to many who thought he was Australian. Davies had brought his 32nd Engineer Regiment home after a grueling and tragic Afghanistan tour.

The regiment, also historically known as 3rd Mercian or Staffords, were combat engineers (sappers) supporting the famed Desert Rats, the 7th Armoured Brigade. Davies was their last commander - the regiment is being broken-up. Many of its sappers are Fijian so when it came to saying goodbye to Davies, the whole regiment lined up behind them and performed a powerful cibi or war dance, advancing on him. When it was over, Davies performed the NZ Maori " Ka Mate" haka.

The Desert Rats posted it on their Facebook page, and the hundreds of comments point to Davies being a much admired commander.

Link to the video: NZ Officer does Haka in Response to Fijian Cibi

Some of the comments:

+ "A fitting tribute to an awesome commanding officer & a man that looked after his regiment."
+ "Goes to show how far and wide our Sapper family is. Never met a bad Kiwi."
+ "That was class and shows what respect he has for the ranks under his command."
+ "Absolutely brilliant. A sure sign of fond respect for a great leader and Steve is one great leader."
+ "Great job Steve but I always thought you were Australian!"
+ "Well done Steve a great bloke who no doubt put his soldiers first every time ... One of the few."

Davies' regiment is set to be disbanded as part of British Government plans to reduce the army by 20,000 troops by 2018. Davies has promised that the battalion's traditions - such as its battle honours, regimental silver and regimental drums - will be carried forward within the reorganised regiment.


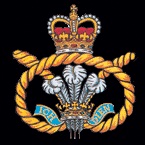
And the famous Staffordshire Knot - the cap badge worn by soldiers for hundreds of years - could be retained in future Mercian uniforms.

"We will go forward together and take the golden threads of our antecedent battalions with us.

"The regiment had a final parade this week. Davies, who led the 3rd Battalion the Mercian Regiment on its nine month tour of duty on the front line in Afghanistan, confessed he was 'choked up' after final parades in Stafford, Wolverhampton, Walsall, Cannock, Newcastle-under-Lyme, Stoke-on-Trent, Tamworth, Burton-upon-Trent, and finally in Lichfield.


Mercian Regiment Cap badge 


"It is emotional for any CO to relinquish command. You invest so much of your hopes, fears and dreams with the battalion that it is always going to be difficult to let go. But it adds a certain poignancy to the situation to be the last Commanding Officer of 3rd Mercian. It has been an honour and a privilege although I understand why it has to go."

The Staffordshire Regiment (Prince of Wales') (or simply "Staffords" for short) was originally an infantry regiment of the British Army, part of the Prince of Wales' Division. The regiment was formed in 1959 by the amalgamation of The South Staffordshire Regiment and The North Staffordshire Regiment (Prince of Wales's).

In 1962 the regiment undertook a six month exercise in Kenya, followed by a year in Colchester and then a return to Kenya for a further two years. On the tour the regiment had to deal with a mutiny by the Ugandan Army. Returning home the regiment was the last unit of the British Army to serve in East Africa.

A home tour in Dover followed in 1964. Then came a two year posting to Berlin in 1968 followed by a tour in Sharjah in the Persian Gulf where the regiment again recorded a 'last unit' distinction being the last unit to serve in Sharjah.

The regiment undertook a tour in Northern Ireland during the Troubles in 1972 before moving to Quebec Barracks in Osnabruck in 1973. Further tours in Northern Ireland were undertaken in 1974 and 1976. The regiment moved to Hyderabad Barracks in Colchester later in 1976 before undertaking another tour in Northern Ireland in 1979.

The regiment moved to Gibraltar in 1981 and to Roman Barracks at Colchester in 1983 before undertaking another tour in Northern Ireland in 1984. It then moved to Fallingbostel in 1986.

In October 1990 The Staffordshire Regiment was deployed to Saudi Arabia as part of 7th Armoured Brigade (referred to as the 'Desert Rats'). The deployment was in response to the dictator Saddam Hussein's invasion of the sovereign territory of Kuwait, claiming it to rightfully belong to Iraq. The regiment moved to Dale Barracks in Chester in 1991, to Abercorn Barracks in Ballykinler in 1994 and Clive Barracks in Shropshire in 1996. The regiment moved to Mooltan Barracks in Tidworth in 2000. Following a deployment to Kosovo in 2002 and a first deployment to Iraq on Operation Telic 6 in 2005, the regiment undertook a second deployment to Iraq during Operation Telic 9 in 2006.

Past amalgamation
As part of the reorganisation of the infantry announced in 2004, it was announced that the Staffordshire Regiment would merge with the Cheshire Regiment and the Worcestershire and Sherwood Foresters Regiment into a new three-battalion regiment to be called the Mercian Regiment. On 1 September 2007 the Staffordshire Regiment became the 3rd Battalion, The Mercian Regiment. It seems amalgamation is on the doorstep again.

Battle honours:

Pre-WWI: Guadeloupe 1759, Martinique 1794, Hafir, South Africa 1878-79, Egypt 1882, Kirbekan, Nile 1884–85, South Africa 1900–02
World War I:
France and Flanders: Mons, Retreat from Mons, Marne 1914, Aisne 1914-18, Armentières 1914, Ypres 1914-17, Langemarck 1914-17, Gheluvelt, Nonne Bosschen, Neuve Chapelle, Aubers, Festubert 1915 Loos, Somme 1916-18, Albert 1916-18, Bazentin, Delville Wood, Pozières, Guillemont, Flers-Courcelette, Morval, Thiepval, Ancre Heights, Ancre 1916, Bapaume 1917-18, Arras 1917, Scarpe 1917, Arleux, Bullecourt, Hill 70, Messines 1917-18, Ypres1917-18, Pilckem, Langemarck 1917, Menin Road, Polygon Wood, Broodseinde, Poelcapelle, Passchendaele, Cambrai 1917-18, St. Quentin, Bapaume 1918, Rosières, Avre, Lys, Bailleul, Kemmel, Scherpenberg, Drocourt-Quéant, Hindenburg Line, Havrincourt, Canal du Nord, St. Quentin Canal, Beaurevoir, Kortrijk, Selle, Valenciennes, Sambre, France and Flanders 1914-18
Gallipoli: Suvla, Landing at Suvla, Scimitar Hill, Sari Bair, Gallipoli 1915–16
Mesopotamia: Egypt 1916, Tigris 1916, Kut al Amara 1917, Bagdhad, Mesopotamia 1916–18
Italy: Piave, Vittorio Veneto 1918
North West Frontier India: Baku, Persia 1918, North West Frontier India 1915
Inter-War: Afghanistan 1919
World War II:
North West Europe: Dyle, Defence of the Scheldt, Ypres-Comines Canal, Caen, Orne, Noyers, Mont Picton, Brieux Bridgehead, Falaise, Arnhem 1944, North-West Europe 1940 -1944
North Africa: Sidi Barrani, Djebel Kesskiss, Medjez Plain, Gueriat el Atch Ridge, Gab Gab Gap, North Africa 1943
Italy: Landing in Sicily, Sicily 1943 Anzio, Carroceto, Rome, Advance to Tiber, Gothic Line, Marradi, Italy 1943 and Italy 1944–45,
Burma: Chindits 1944, Burma 1943–44
Post-WWII: Gulf 1991, Wadi al Batin

3 July 2014

Franz Ferdinand a Century on

This year sees the Centenary of the Outbreak of Hostilities in WW1

28 June 1914: The spark to the barrel of black powder that was Europe - The assassination of The Austrian Arch Duke, Franz Ferdinand by a disgruntled student, Gavrillo Princip in Sarajevo.


These facts I memorised when I was 14 or 15. To me (at the time) a faceless noble assassinated by an angry young man in a country that no longer existed, far, far away. It plunged the world into the greatest conflageration ever, the war to end all wars, we thought. At least for 20 years or so.


So today, for the first time, I got (figuratively speaking) eye to eye with Franz Ferdinand. And his tunic. Or at least a picture of it on Stuff.co.nz. Strange how history comes alive in the strangest ways, triggering something in the brain. 


In an event that is widely acknowledged to have sparked the outbreak of World War I, Archduke Franz Ferdinand, nephew of Emperor Franz Josef and heir to the Austro-Hungarian Empire, is shot to death along with his wife by a Serbian nationalist in Sarajevo, Bosnia, on this day in 1914.

The great Prussian statesman Otto von Bismarck, the man most responsible for the unification of Germany in 1871, was quoted as saying at the end of his life that "One day the great European War will come out of some damned foolish thing in the Balkans." It went as he predicted.

The archduke traveled to Sarajevo in June 1914 to inspect the imperial armed forces in Bosnia and Herzegovina, former Ottoman territories in the turbulent Balkan region that were annexed by Austria-Hungary in 1908 to the indignation of Serbian nationalists, who believed they should become part of the newly independent and ambitious Serbian nation. The date scheduled for his visit, June 28, coincided with the anniversary of the First Battle of Kosovo in 1389, in which medieval Serbia was defeated by the Turks. Despite the fact that Serbia did not truly lose its independence until the Second Battle of Kosovo in 1448, June 28 was a day of great significance to Serbian nationalists, and one on which they could be expected to take exception to a demonstration of Austrian imperial strength in Bosnia.

June 28 was also Franz Ferdinand's wedding anniversary. His beloved wife, Sophie, a former lady-in-waiting, was denied royal status in Austria due to her birth as a poor Czech aristocrat, as were the couple's children. In Bosnia, however, due to its limbo status as an annexed territory, Sophie could appear beside him at official proceedings. On June 28, 1914, then, Franz Ferdinand and Sophie were touring Sarajevo in an open car, with surprisingly little security, when Serbian nationalist Nedjelko Cabrinovic threw a bomb at their car; it rolled off the back of the vehicle and wounded an officer and some bystanders. Later that day, on the way to visit the injured officer, the archduke's procession took a wrong turn at the junction of Appel quay and Franzjosefstrasse, where one of Cabrinovic's cohorts, 19-year-old Gavrilo Princip, happened to be loitering.

Seeing his opportunity, Princip fired into the car, shooting Franz Ferdinand and Sophie at point-blank range. Princip then turned the gun on himself, but was prevented from shooting it by a bystander who threw himself upon the young assassin. A mob of angry onlookers attacked Princip, who fought back and was subsequently wrestled away by the police. Meanwhile, Franz Ferdinand and Sophie lay fatally wounded in their limousine as it rushed to seek help; they both died within the hour.


Moments before the assassination


FF's blood stained tunic, on display in Vienna

The assassination of Franz-Ferdinand and Sophie set off a rapid chain of events: Austria-Hungary, like many in countries around the world, blamed the Serbian government for the attack and hoped to use the incident as justification for settling the question of Slav nationalism once and for all. 

As Russia supported Serbia, an Austro-Hungarian declaration of war was delayed until its leaders received assurances from German leader Kaiser Wilhelm that Germany would support their cause in the event of a Russian intervention–which would likely involve Russia's ally, France, and possibly Britain as well. 

On July 28, Austria-Hungary declared war on Serbia, and the tenuous peace between Europe's great powers collapsed. Within a week, Russia, Belgium, France, Great Britain and Serbia had lined up against Austria-Hungary and Germany, and World War I had begun.


FF and Sophie lying is state

Strange how the same names keep coming up in history. Sarajevo, Kosovo, Moscow, Rome, Mesopotamia, Greece, the Balkans, Egypt, Israel, Palestine, sometimes the names and the players change, but the pressure points remain the same, or just shuffled in the pack of destiny...


A scene to be replayed about 50 years later, at greater range
 in Dallas, Texas, November 222, 1963? 

.

29 June 2014

Options, options...the kid in a candy store

Decisions, decisions, all those options...

The Kid in the Candy Store

As with  most wargamers, I too am a sucker for the new and shiny, or different. Add to that the historical aspect, and you've got me hooked! So always looking at directions my wargaming can take, I thought I had been seduced by SAGA.

X-Wing did pique my interest too, being very playable, but I have to confess that the building and painting is as important to me as the playing. So pre-painted, Meh!


Remember Rackham's Confrontation? Well, they lost me when they started marketing pre-painted figures. They had some amazing sculpts, but why would you want to try and sell pre-painted minis?
Mass appeal and sales, I suppose. Killed Rackham, that did ! So despite the huge popularity of X-Wing I have decided not to indulge.


But then came SAGA. My, oh, my...looking very tempting. Paul over at Dog of War has got me interested.
Playing my first game in July. No, in fact I have been interested since I first saw the Gripping Beast Minis in a Wargames Illustrated a couple of years ago. Now who DOESN'T like Vikings?
So off I go onto SAGA websites, and find the closest Griping Beast retailer - over in Australia it seems.

Then comes Nick on Thursday:  "Hey, it's the anniversary of Waterloo next year! How about we but on a large scale Waterloo game. You're fond of the Germans! Why don't you take the Prussians or the Austrians?"

My knee jerk was "No, I have too many models, armies and scales as things stand"
Remembering then that I happen have some old 20 mm Airfix Black Guard.
 I did toss in the question: "Which scale?"
Says Young Nick: "28 mm !"  Hmmm... So on Friday I get the weekly epistle of deals from Hannants in the UK, and my fingers somehow find their own way over to the Napoleonics.

Victrix seem to have a nice plastics selection, quite cheapish too at around a dollar a figure, as does Perry. Interesting discourse on TMP (The Miniatures Page) about quality and finishing. Boxes of 50, as with SAGA. (Eat your heart out, GW)


Not much painting or building went on the weekend, as I had to attend an advanced cardiac life support training course in Wellington. Grabbed the chance to stay overnight and have an evening out with my lovely wife, without the kids. Saturday was spent in the National Clinical Simulation Unit training and then an exam at the end. Passed without event. Box ticked.

Got a little bit of painting done on my unpainted horde of warriors of chaos. Hoping some of these may double as Vikings one day...Who knows

Displaying photo.JPG

Poor quality phone photo of my horde

24 June 2014

Operation Bagration: The first shots fall

First Shots of Operation Bagration

Thursday night, games night. Happens to almost co-incide with the actual 70th anniversary of Operation Bagration.

Flames of War in 20 mm. Second or third FoW game for Laurie, ably assisted by David, and visitor (and  potential new member) Tielman, ex Frankfurt am Main in Germany (Impartial observer, but obviously an experienced gamer)

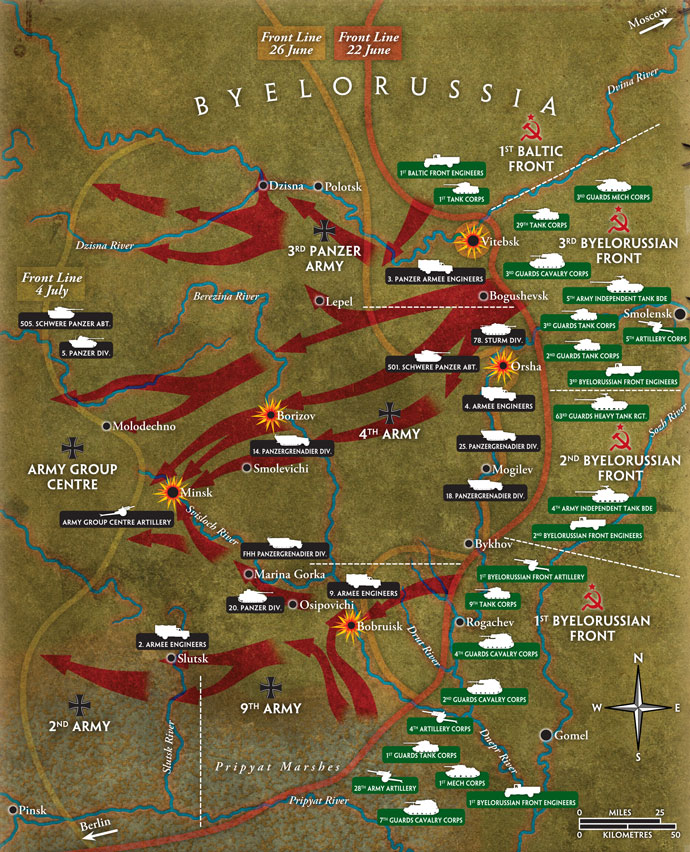
Operation Bagration 22 June - 26 June

22 June 1944: A German Panzer Comapny meets up with a Russian Tankovy suppported by a small Motostrelkovy.

2 pre-prepared 1000 points lists:
I roll to get the Germans, Laurie to command the Soviets.

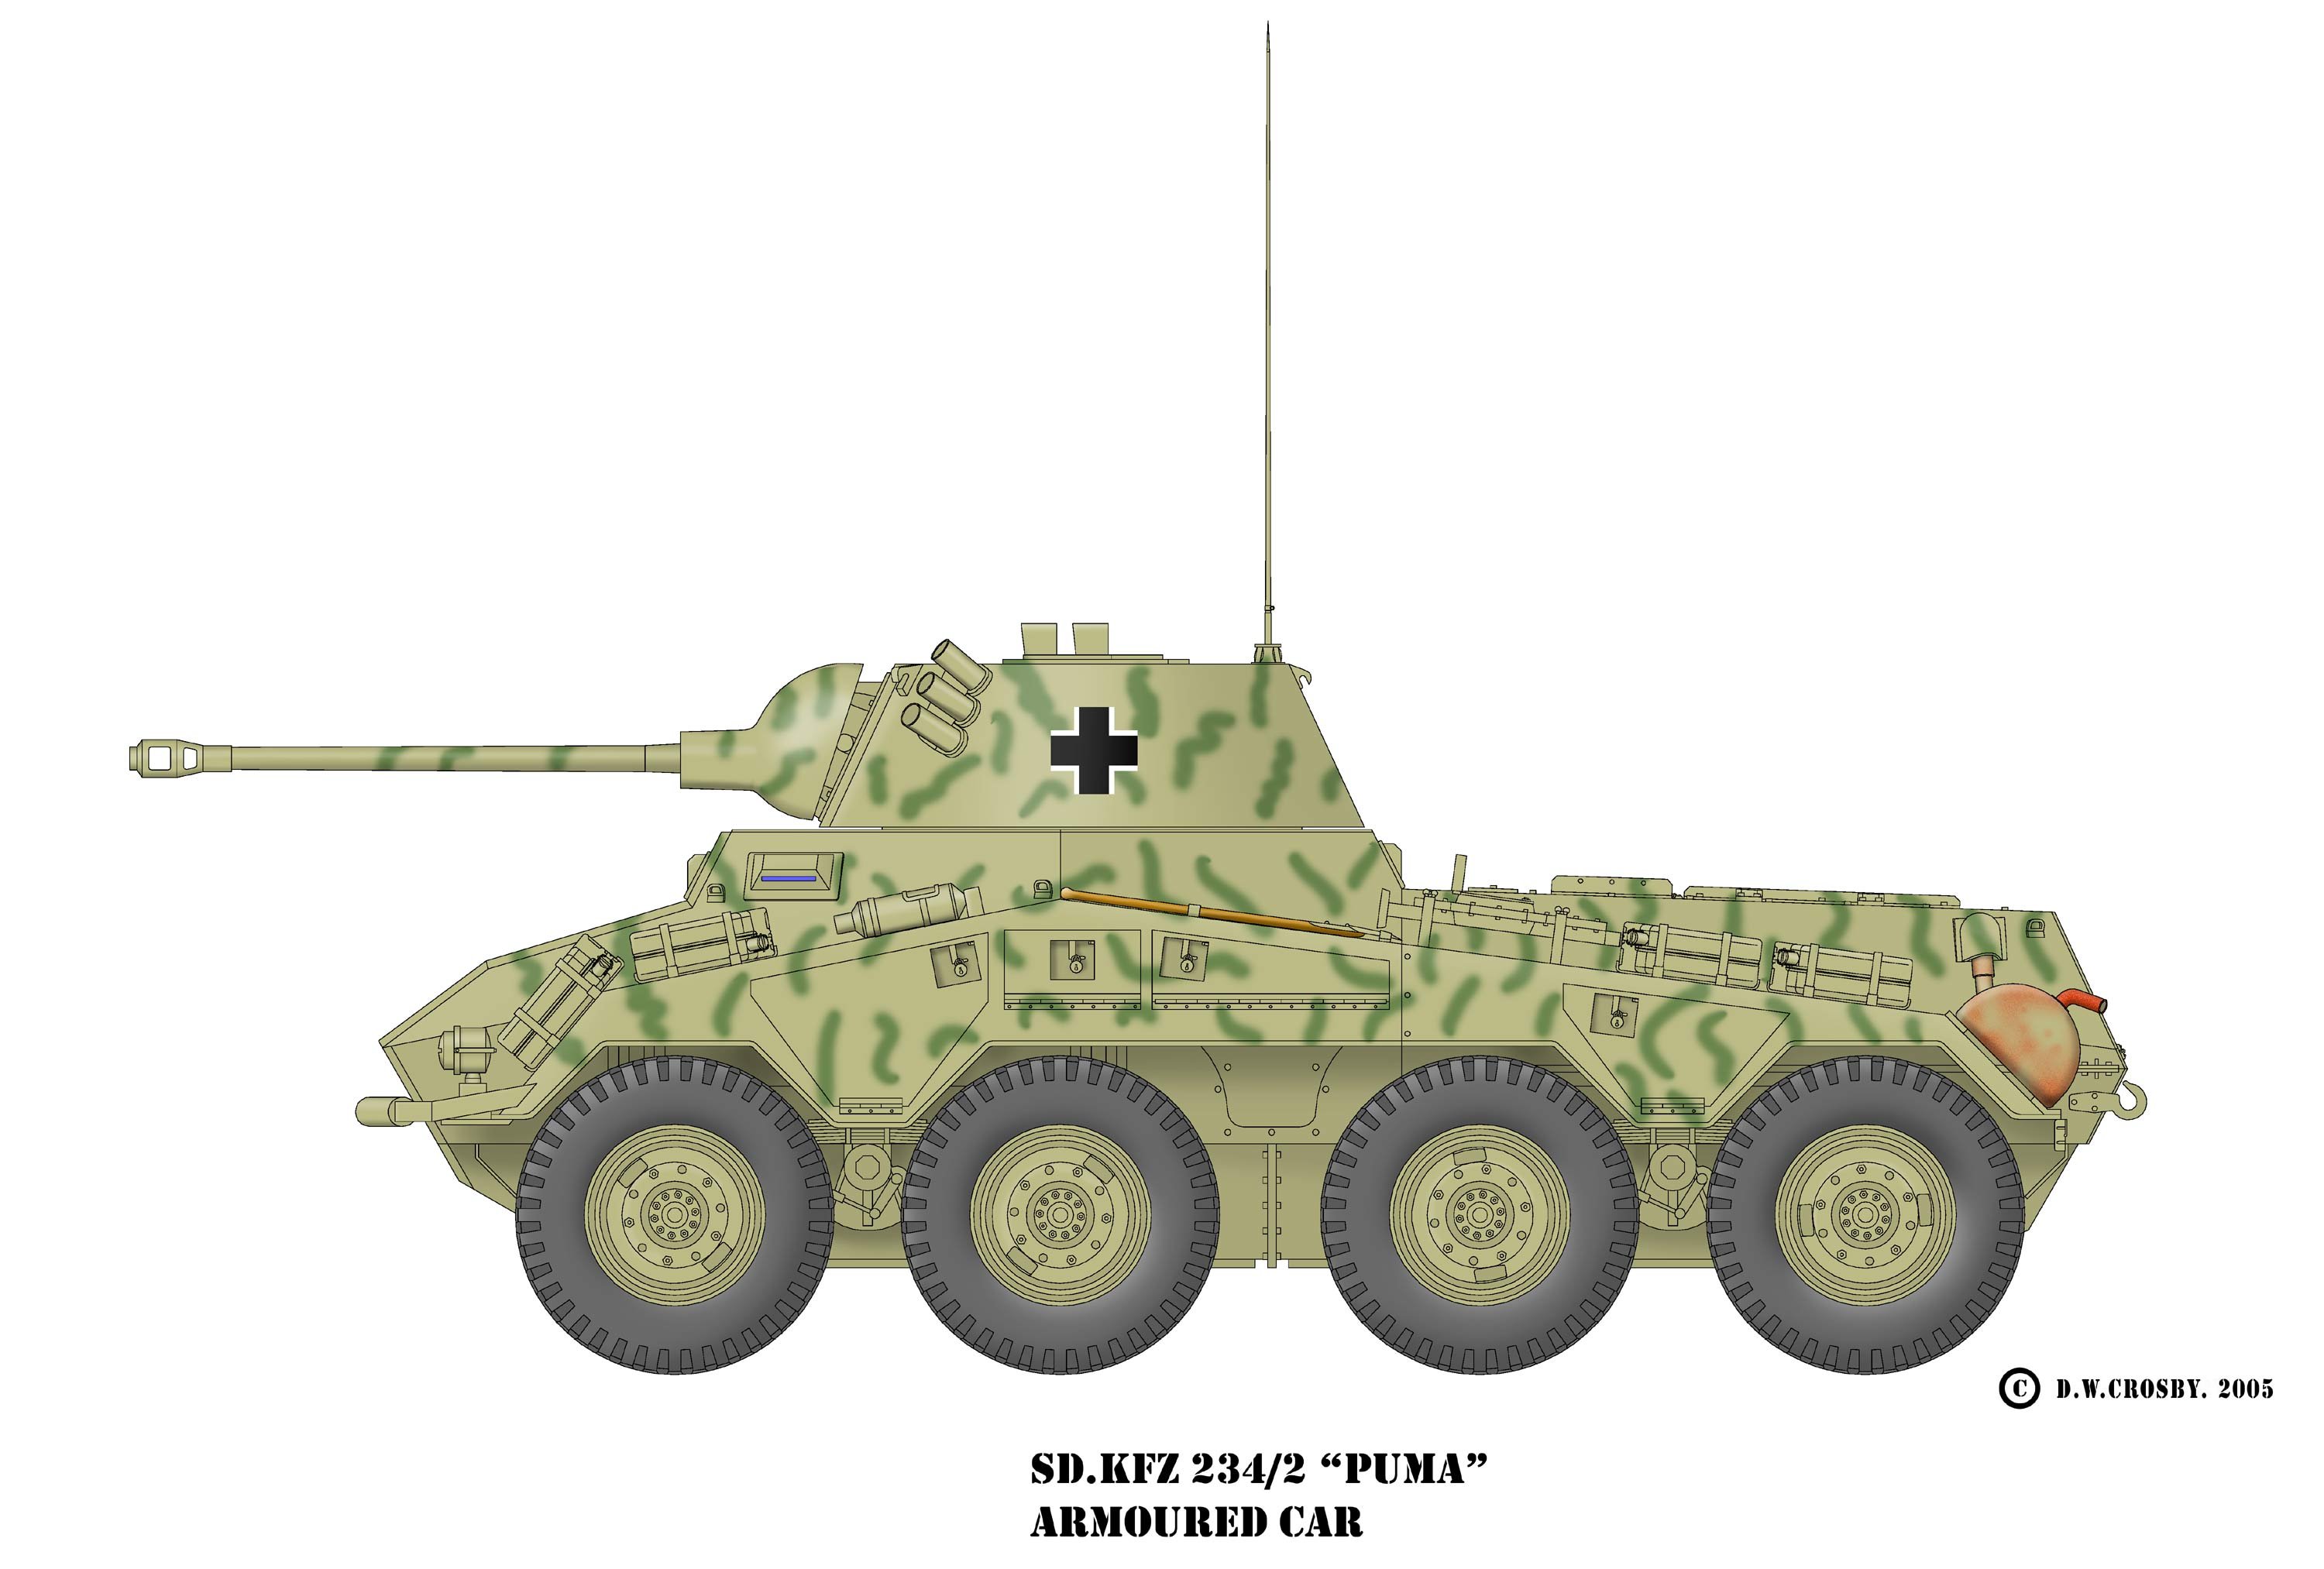
Germans field a Panzer IV unit, 4 Panzer IV Gs and a command section with the Major and the 2 IC in similar tanks and a recovery SdKfz 11;  KWK 75mm long guns, 2 Reconaissance  Armoured cars: 2 Pumas with 50 mm KWKs, 3 Stug Gs, one with saukopf mantlet (Thanks Scott, nice and easy way to distinguish troop commander) and 2 with square mantlet. 2 x Pak 40s. No more points left after that :( 
Germans are confident veterans of the Ostfront.

Russkis have Command and 2-IC in T-34 Obr 1942's, another troop of 5 x T-34s, and a separate troop of 6 Sherman lend-lease tanks. Mortar section with 4 x 120 mm heavy mortars; and the Motostrelkovy with 2 Maxim HMGs. Kommissar to invigorate the somewhat reluctant infantry. Russians are confident trained

Laurie rolls, and elects that I deploy first.

Terrain
We have an open rolling pastoral landscape, some where east of the Dnieper river. (So 9th German Army and 9th Russian Tank Corps elements coming head to head, leading up to the large clash at Bobruisk. (!st Byelorussian Front) Pripyat (Pripet) Marshes do not feature (yet):

A single farm-house with two small wheat fields at the centre of the table, a small copse of fir trees to the north and south, and a low hill to the west. A chance engagement, with both forces vying for the farmhouse, with an unsubstantiated  rumour that went round that an attractive farm-girl who brews her own Vodka resided there...


The Panzerspaeh unit deployed first, off to the southern edge of the table. Knee-jerk response from Generalski Laurie saw the 6 Shermans deployed to cover the flank. The Germans then deployed 3 stugs threatening their flank in return.
Russians deployed their T34s on the Northern flank. Germans set 2 x Pak 40s in the centre of their lines, with direct lines of sight to T34 unit.

Displaying photo.JPG

Let's take out the soft armoured cars first! Then we take the woods.

The soviet mortars took position on the far left corner, with observers in the woods. German command tanks parked behind the Pak 40s, able to strike left or right, depending where the threat came from. 

Russian commander sought to bolster the numbers of his T-34 force, and followed in the furrows ploughed by the lead tanks. Russian Motostrelkovy deployed amongst the Sherman tanks, set to take the objective in the forest between them and the Pumas. Last to deploy were 4 Zis-3 AT guns, straddling the centre of the board on the Russian side. The bulk of the farm house interfering with line of sight to the Pak 40s (phew!)

Genl. Lauriski goes first: Shermans roll forward, and take a bead on the Pumas. Being recce vehicles they decide that discretion is the better part of valour. Or so they thought: Out of the frying pan and into the fire. Well, sort of. One vehicle was able to scoot behind the low hill and out of sight, but the lead armoured car went too far, and exposed himself to the line of fire of the rear-most Sherman. Fatal mistake.

Mortars range in on the Pak40s, succeed in dropping their 120 mm ordnance, but failing to do any damage.
Not so the T-34s. The two PzKfw IVs go up in flames. The Russians artillery fails to do any damage, and their unit commander radios for the Kommissar to come over.


The Germans are infuriated by the loss of their beloved PzKfw IVs, the troop commander fires off two rounds, two hits, and two T34s go up in smoke. "See Ivan, this is what Krupp Steel does !"

The Pak 40s follow suit, and soon 4 T-34s in total are blazing hulks. The hot-headed junior officer in the Puma is encouraged by the success of the artillery, and charges into the flank of the Sherman unit, quite foolishly. He pumps two shots into the nearest Sherman's flank, destroying it. In his urge to avenge his colleagues he ends his game turn hopelessly exposed. 

The grizzled veteran Heer stug commander shrugs. "Must have a throat ache !" (Wehrmach slang for a desire to obtain the knight's cross, worn at the throat) A volley of 6 armour piercing 75mm shots from the StugGs, and several Tommy Cookers live up to their names, except in this case it is Ivan receiving the heat, not Tommy.

Turn 2 sees the Motostrelkovy take the objective in the woods on the back of the Sherman thrust; without firing a single shot, and the Shermans turn their attention to the isolated Puma and the Stugs, destroying the Puma outright. The Ritterkreuz was bestowed posthumously on Leutnant Brasch. The low profiles of the Stugs and having to shoot through the woods makes life difficult for the Russian gunners. Shots hit, but fail to do any damage. Another dismal performance from the artillery. 

Mortars again make up for the lack of efficacy from the Zis 3s, and destroy the observation team for the 75mm guns.Glancing shots hit the Command Unit's tanks, they bale out, but remount in their turn.The remaining panzer fails its morale test, and flees off the table to warn the OKW about what is happening.

Germans counter-attack, with the Stugs wiping out the Shermans, and the Pak 40s sowing sorrow among the T-34s, destroying them to the man, commander included. The Soviets will have to start taking company morale tests!

Soviets pass their first company morale check, and turn to their artillery to finish the job. It appears the artillery have finally found their mark! Maybe the threat of the Kommissar increased their zeal, or was it the sight of 2 PzIVs barrelling down on them ? Blam goes the SdKfz 11  recovery vehicle of the command platton

Displaying photo.JPG

Two stugs go up in flames, a Pak 40 is lost, and the gunnery command team too. The Strelkovy prefer sit on their objective in the woods, smoking those black Russian cigarettes with the acrid smoke...

The German turn sees their command unit making a bee-line for the farm-house, trying to shelter from the Zis 3 guns. The stug makes double time to get to the second objective. By hook or by crook...


A war of attrition ensues. Ivan hits and bails both the command panzers. The Pak 40 survives, but the Stug is also bailed. Looking pretty grim for the Germans. "Ach Hans, I could see the Liebling with the Vodka!"

Displaying photo.JPG

The Stug crew successfully remounts, but both the PzIV remain bailed. Looks like the writing is on the wall...

Lauriski rolls his company morale test: a 1!
No! The Soviets crumble and run ! Apparently they had enough. I suspect some harsh words and actions will follow from Herr Kommissar, Ja?

An epic slog-fest, and a very enjoyable game.


16 June 2014

Fires of October: Interesting What if ? for Wargamers

1962. The US invades Cuba. Wargaming of a "What If ?" scenario beckons


What if the US had invaded Cuba in 1962: An interesting scenario to play. A new book contemplates what could have been and newly declassified information. Apparently it came close to happening...


Fires of October is a critical and detailed analysis of the military aspects of the Cuban missile crisis in 1962.
This now tops my reading list!

 It describes how close we came to a nuclear conflict by outlining the strength of Soviet tactical and strategic nuclear weapons in Cuba, and how the use of these weapons was delegated to commanders in the field.
What is unique about this book?

This is the first book that explores the great “what if” of the Cuban Missile Crisis – the planned US invasion of Cuba. In a subject that has had hundreds of books and articles written about it, Blaine Pardoe has broken new ground in an area previously glossed over by most historians. With this book, readers will get their first glimpse into what the invasion, code-named Operation Scabbards, could have been like and what the US would have faced on Cuba.

What research material was used?

Fires of October has leveraged newly declassified materials from the US National Archives and other government agencies to tell the story of a military campaign cancelled only hours before initiation.  Many of these materials have only just come to light, having been incorrectly labeled and catalogued.  The author spent five years meticulously piecing together the information into a coherent narrative.

Just how close did the US come to invading Cuba?

The Cuban Missile Crisis was one of the most fluid and potentially dangerous situations that the US faced in the Cold War.  The United States was just 48 hours from initiating the air campaign, which would have been followed by a massive airborne and amphibious assault on the island ten days later.

Would it have been a cake walk?

Many authors have alluded to the fact that the US possessed overwhelming military might, and would have crushed the Cubans and Soviets on the island. But contemporary research shows that the US intelligence assumed only 12,000 Soviets were present, but actual forces totaled over 40,000.  The opposing forces had numerous front-line Soviet tanks and armored vehicles. The Cubans were deeply entrenched and prepared for an American attack as well, with over 100,000 troops ready and mobilized.

OP Plan 316-62 – Operation Scabbards – called for airborne assaults to seize airfields which, unknown to the Americans, were less than two miles from Soviet headquarters positions. Much of the fighting in and around Havana would have been vicious urban combat, which always favors the defenders.  The Americans were seriously hampered from landing the necessary tanks, and lacked sufficient armaments for a prolonged campaign.  It is quite possible that invading Cuba could have slipped into a Viet Nam-type campaign.

What about nuclear war with the Soviets?

Mr. Pardoe has sifted through Civil Defense and Department of Defense information to carry out the impact of nuclear conflict with the Soviets as a result of an invasion. He covers the potential nuclear trigger points and, using a simulation from only a month prior to the crisis, recreates what the potential impact might have been on the United States – city by city.

Blaine Pardoe is an award winning author of numerous books in the science fiction, military non-fiction, true crime, paranormal, and business management genres.  He has appeared on a number of national television and radio shows to speak about his books.  Pardoe has been a featured speaker at the US National Archives, the United States Navy Museum, and the New York Military Affairs Symposium. He was awarded the State History Award in 2011 by the Historical Society of Michigan, and is a two-time silver medal winner from the Military Writers Society of America in 2010 and 2013.

In 2013 Mr. Pardoe won the Harriet Quimby Award from the Michigan Aviation Hall of Fame for his contributions to aviation history. Mr. Pardoe is also a board member of the League of WWI Aviation Historians.

His works have been printed in six languages, and he is recognized world-wide for his historical and fiction writing.